AWSのEC2(Amazon Linux 2023)の作成からFastAPI起動まで
本記事では、Amazon Linux 2023を使用したAWS EC2インスタンス上で、Pythonの人気WebフレームワークであるFastAPIアプリケーションを構築する手順を丁寧に解説します。FastAPIに初めて触れる方でも安心して進められる具体的なステップを提供し、サーバーのセットアップからアプリケーションの起動までを網羅しています。FastAPIの詳細な機能解説は省き、実践的な環境構築にフォーカスしていますので、すぐに実用的な成果を手に入れたい方におすすめです。特に以下の人におすすめです。
- AWSでの開発環境構築に興味がある方
- FastAPIを使った開発を始めたい方

EC2インスタンスの設定を行うIAMユーザにはAdministratorAccessポリシーを持つユーザを作成して実行しています。
目次
EC2インスタンスの作成
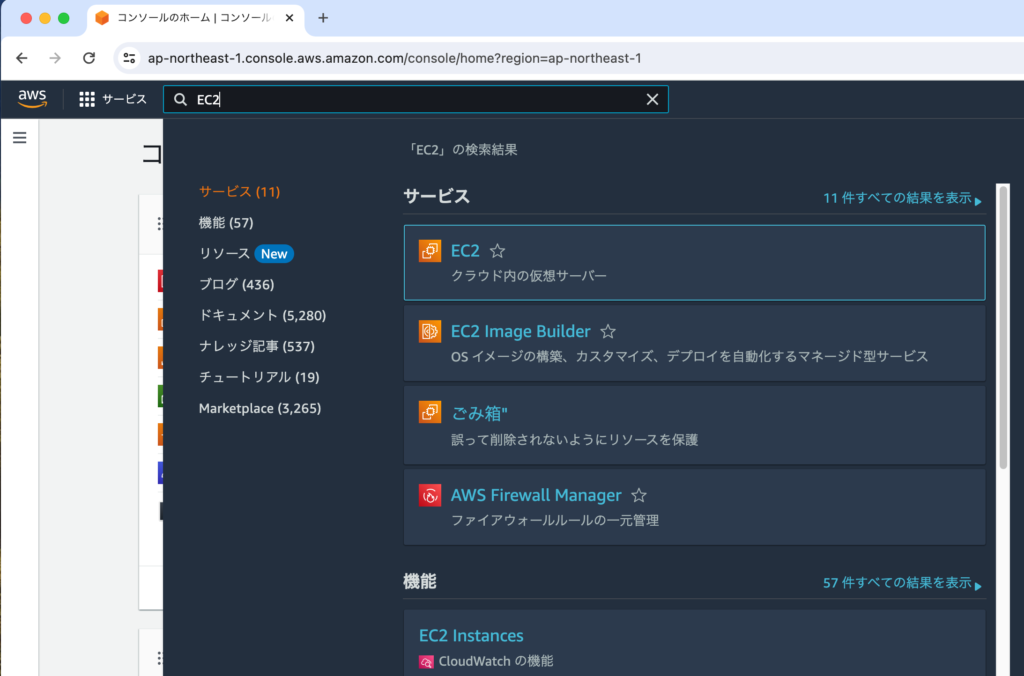
AWSのManagement Consoleにアクセスを行い、上部にある検索窓からEC2を入力するとサービスにEC2が表示されるので表示されているEC2を選択します。
インスタンスを起動から開始
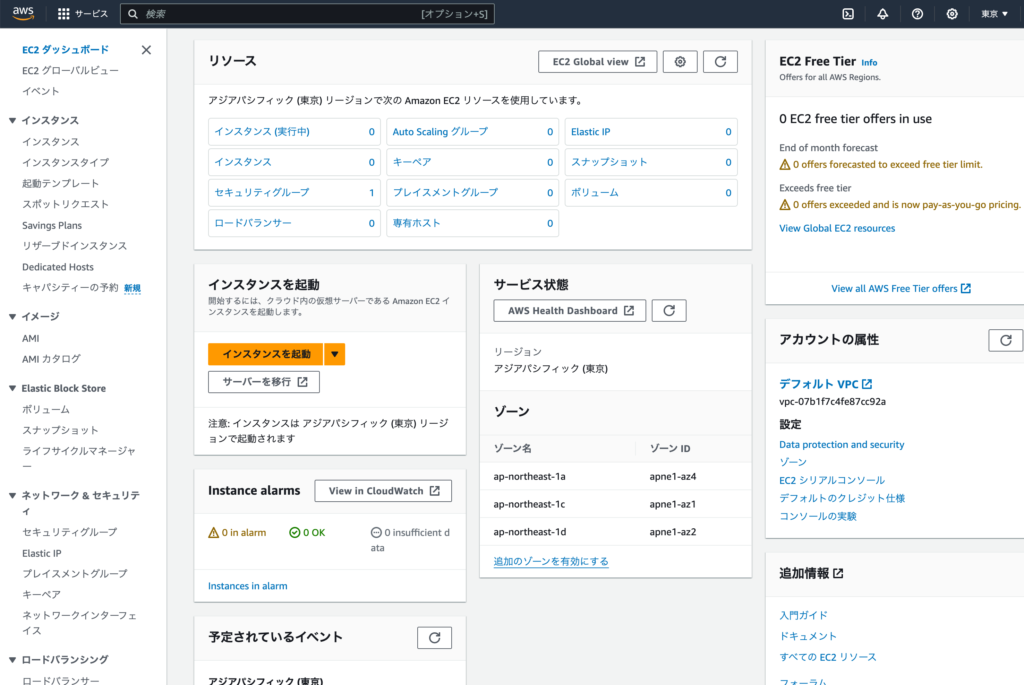
EC2のダッシュボードが表示されます。AWSのアカウントの作成直後の場合にはEC2のインスタンスが存在しないので新たにインスタンスを作成するために画面中央にある”インスタンスを起動”をクリックします。はじめはインスタンスを起動だと作成済みのインスタンスを起動するように思いますがインスタンスの起動はインスタンスを作成することです。
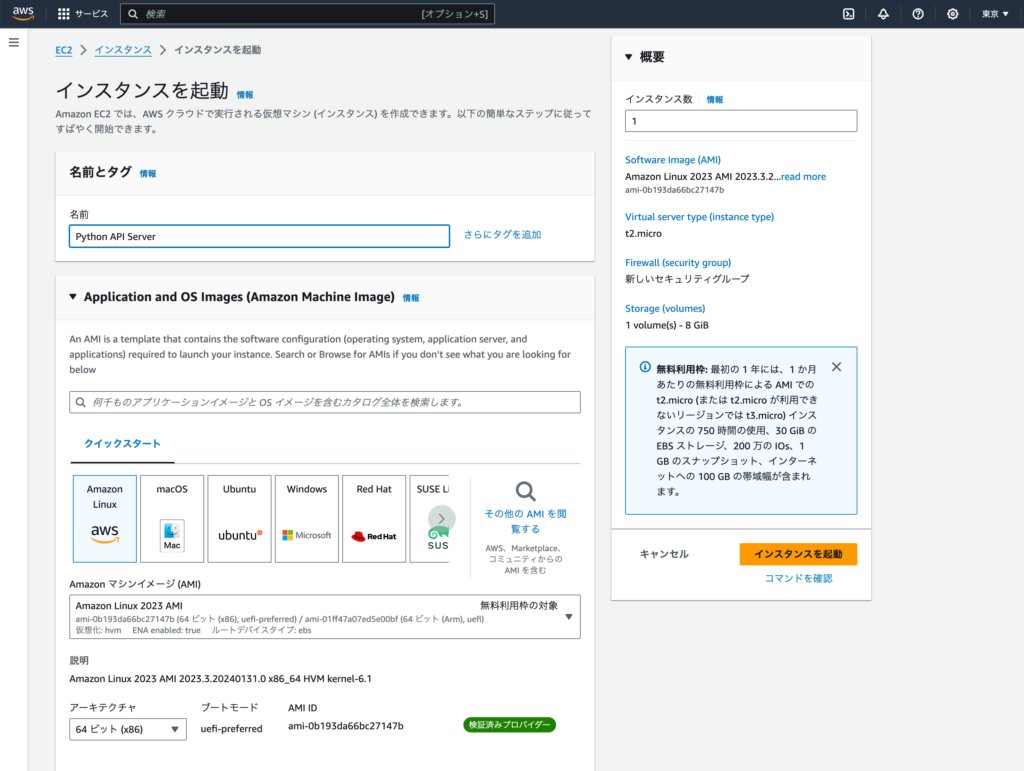
インタンスを起動画面が表示されるので任意の名前のインスタンス名を設定します。名前を設定後、EC2のインスタンスで利用するOSのイメージを選択します。本文書ではAmazon Linux 2023を選択します。Amazon Linux 2023以外にもさまざまなAMI(Amazon Machin Image)を選択することができますが無料で利用する場合には無料利用枠の対象が表示されているものを選択してください。Amazon Linux 2023を選択するとOSがインストールされているだけではなくec2-userユーザを利用してログインができるように設定が行われておりインスタンスを作成後すぐに利用することができます。
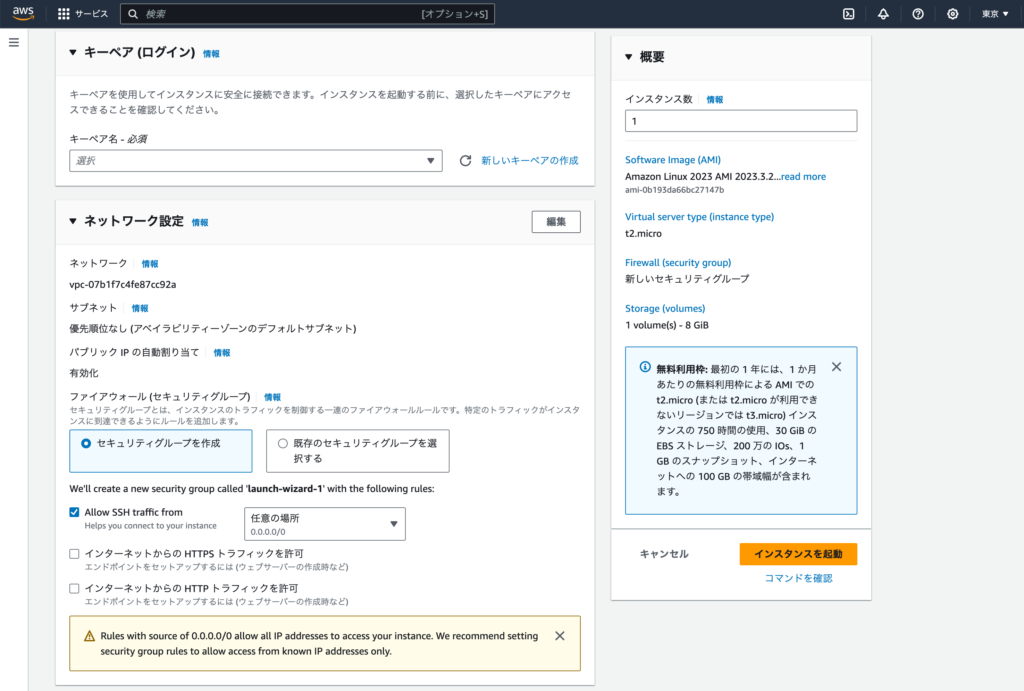
画面をスクロールするとキーペア(ログイン)の項目が表示されるので新しいキーペア(公開鍵、秘密鍵)の作成をクリックします。作成するキーは現在作成を行っているEC2のインスタンスにSSHでターミナルから接続する際に利用します。
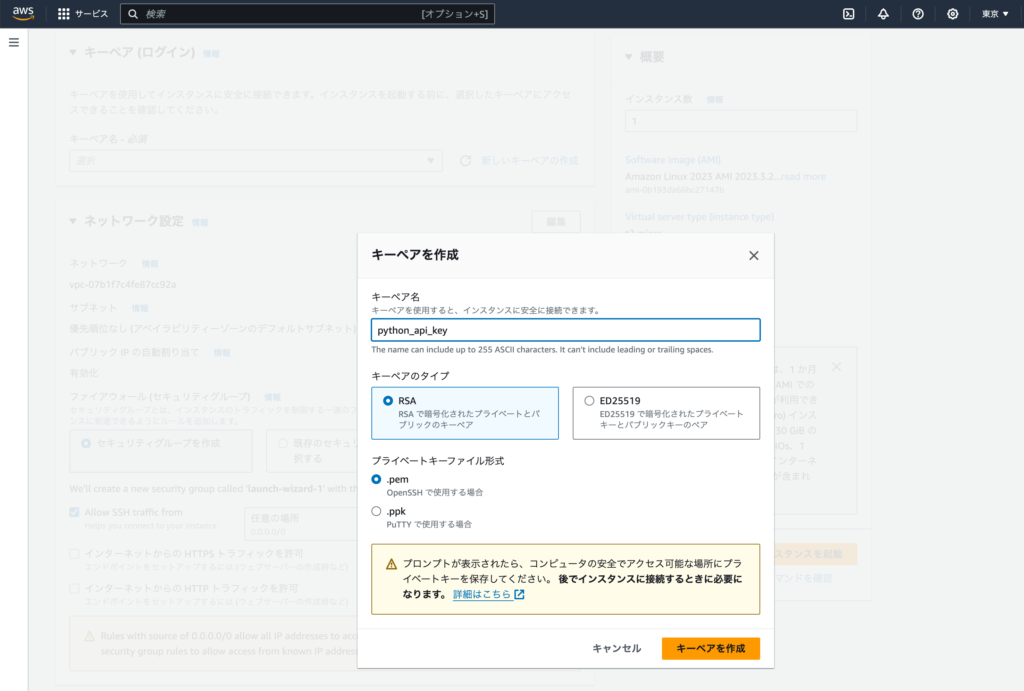
キーペアの作成画面がモーダルで表示されるのでキーペア名の設定、キーペアのタイプとファイル形式を選択してキーペアを作成ボタンをクリックするとキーペアが作成され、キーペア名で設定したファイルがダウンロードされます(拡張子はpem)。ダウンロードしたファイルの中に秘密鍵の情報が記述されているので大切に保管していください。
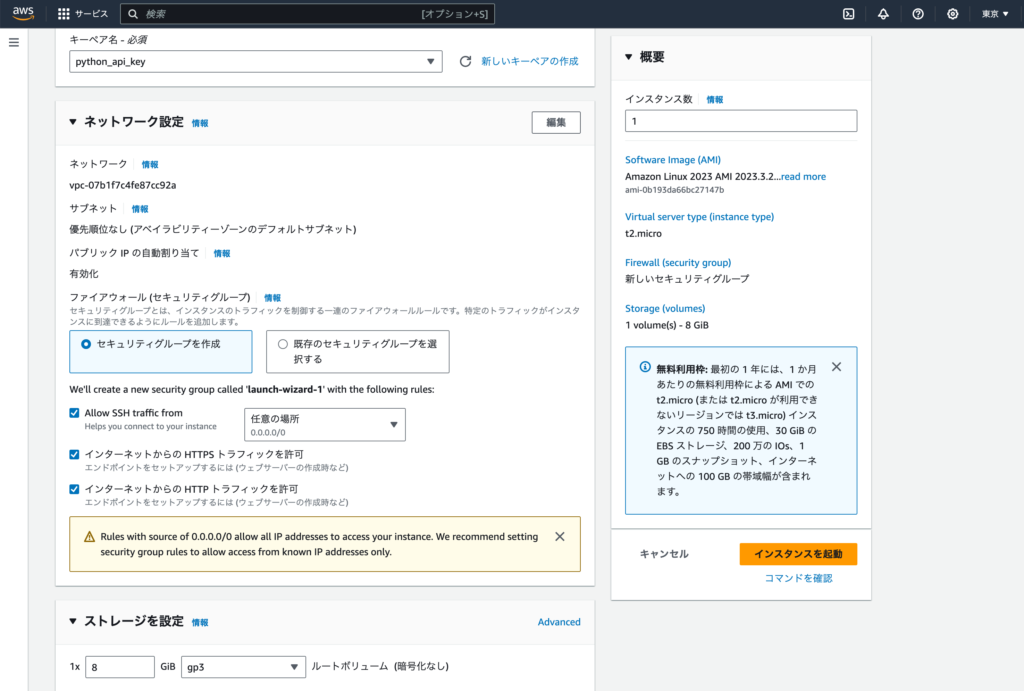
外部からのアクセスの制限を行うセキュリティグループ(ファイアウォール)の作成を選択するとここでは”launch-wizard-1″という名前のセキュリティグループが作成されます。デフォルトではSSHの通信の許可にチェックが入っていますがHTTPSとHTTPトラフィックの許可にもチェックを入れます。チェックすることでSSH, HTTPS, HTTPのポートが開放され利用することができます。HTTPSにもチェックを入れていますが本文書の範囲ではSSH, HTTPのみ利用します。
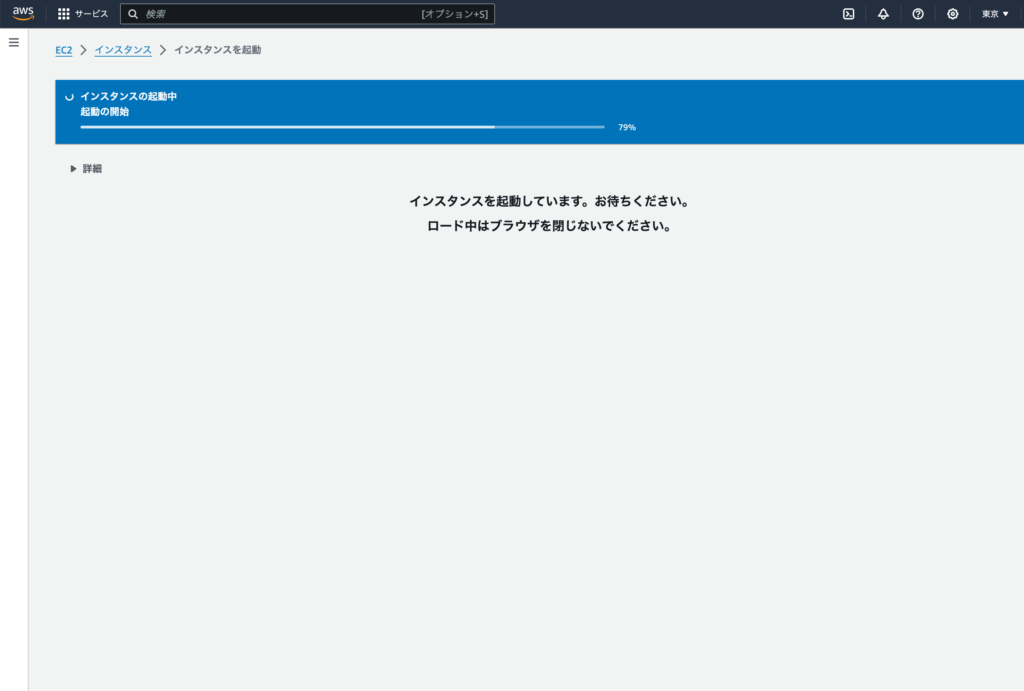
ここまでの設定を行ったら、最後に”インタンスを起動”をクリックするとインスタンスが作成され起動が開始されます。
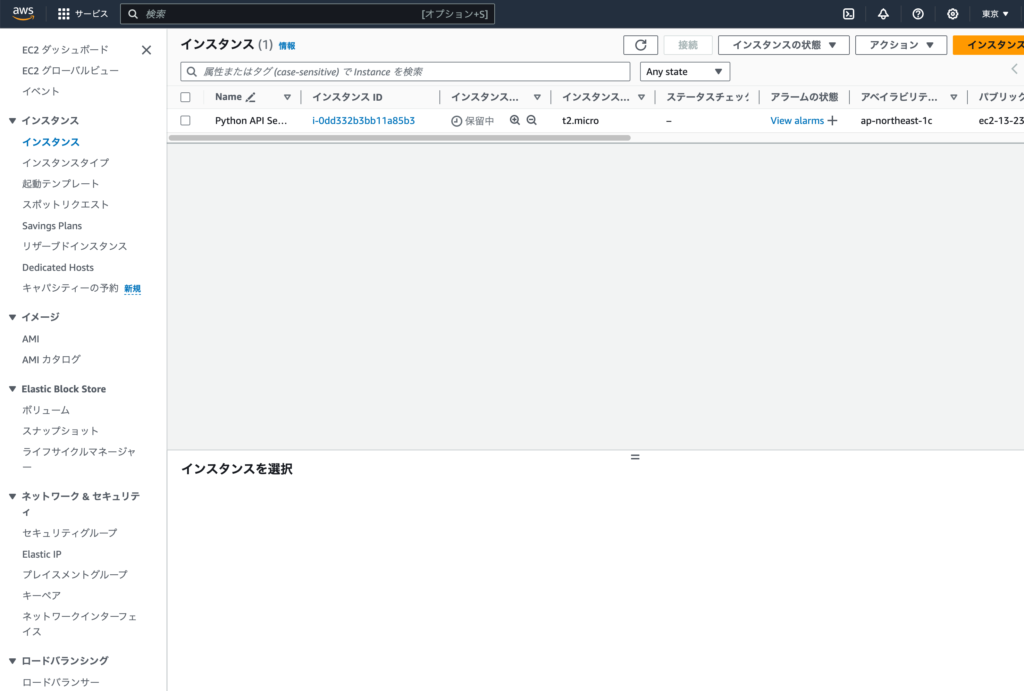
インスタンス作成後はインスタンス一覧画面が表示され作成したインスタンスの情報が表示されます。インスタンスIDをクリックするとインスタンスの情報を確認することができます。
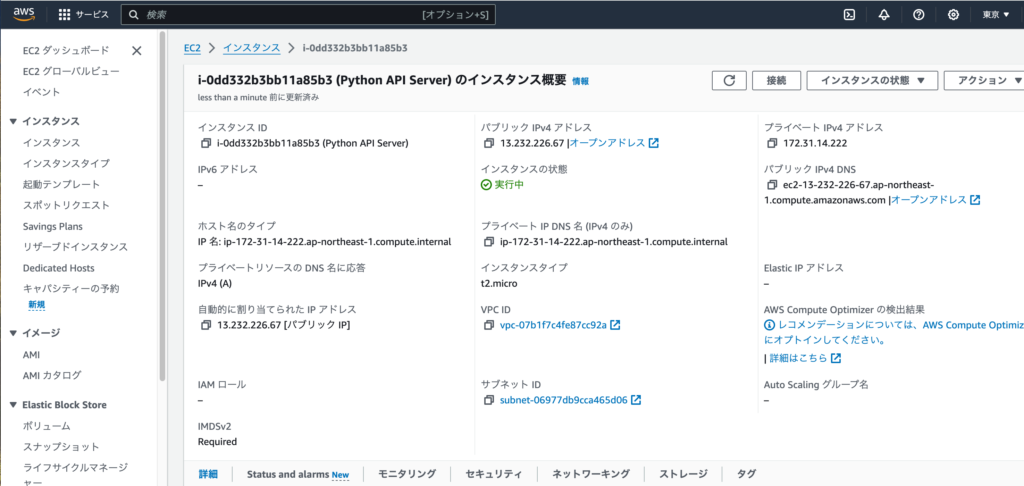
インスタンスの概要画面
インスタンス概要画面が表示されIPアドレスやインスタンスの名前などを確認することができます。インターネット上からアクセスするために利用するパブリックIPアドレスやパブリックDNSの値を確認することができます。これらの値はインスタンスを停止して、起動すると変わります。表示されている内容を利用してもアクセスはできません。
インスタンスへの接続
作成したインスタンスには外部からログインを行い、コマンドラインで操作を行うことができます。インスタンスの状態が実行中の時はインスタンスが起動しているので、インスタンスに接続を行うための右上の接続ボタンをクリックすることができます。
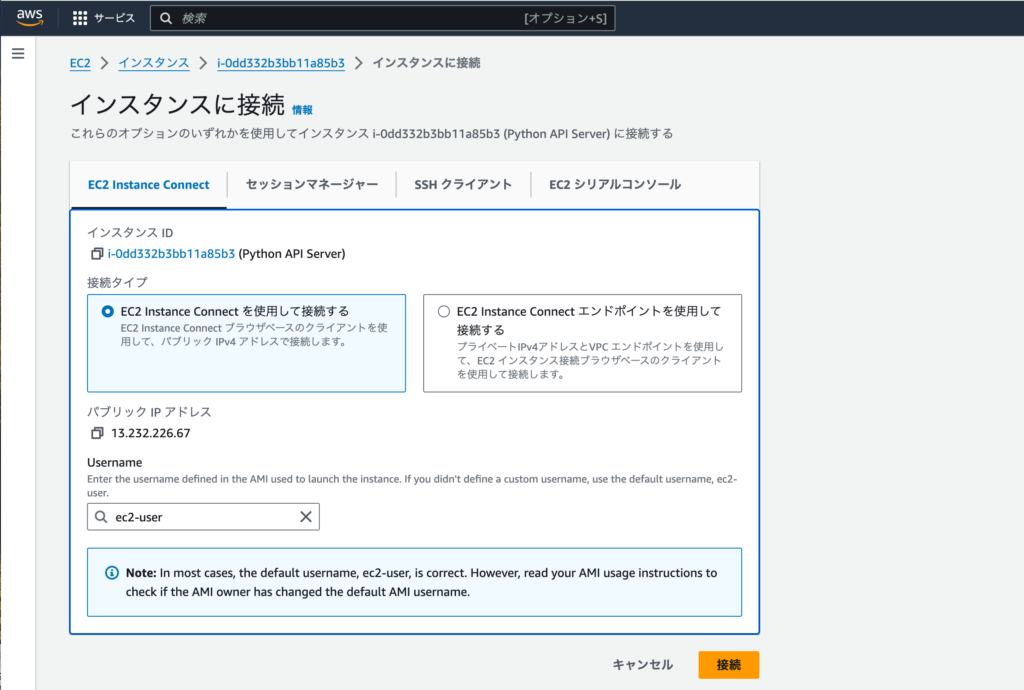
EC2 Instance Connect接続
接続タイプの”EC2 Instance Connectを使用して接続する”を選択して”接続”ボタンをクリックするとインスタンスに接続することができます。パブリックのIPアドレスを経由してブラウザでEC2インスタンスに接続することができます。アクセスにはec2-userを利用して行います。
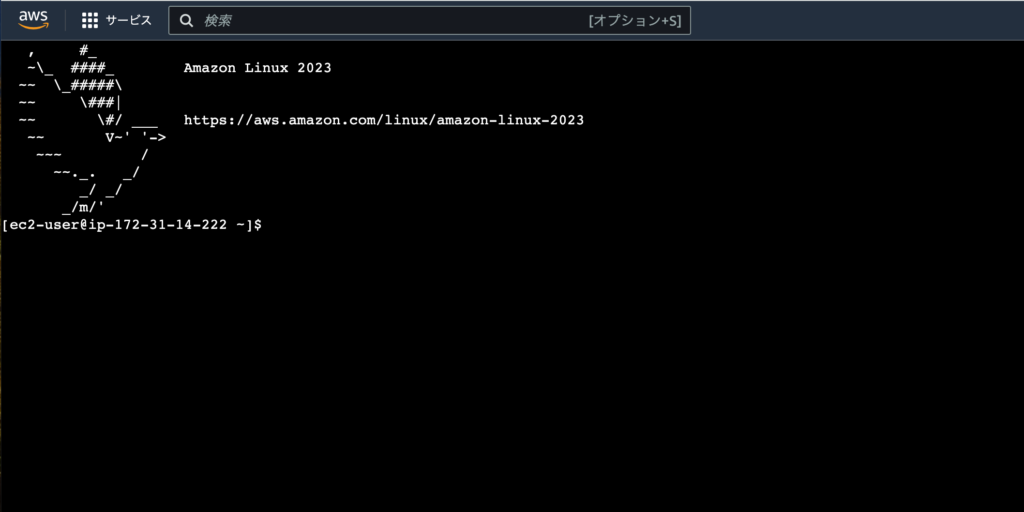
下記はEC2 Instance Connectを利用してインスタンスに接続した後に表示されるブラウザ上での画面です。コマンドプロンプトが表示されるのでコマンドを入力して実行することができます。
SSHによる接続
インスタンスを起動する際に作成した秘密鍵のキーファイル(*.pem)を利用してSSHでEC2インスタンスに接続することができます。”インスタンスに接続”画面のSSHクライアントのタブをクリックすると接続方法についての説明が記述されているので記述通りに設定を行っていきます。
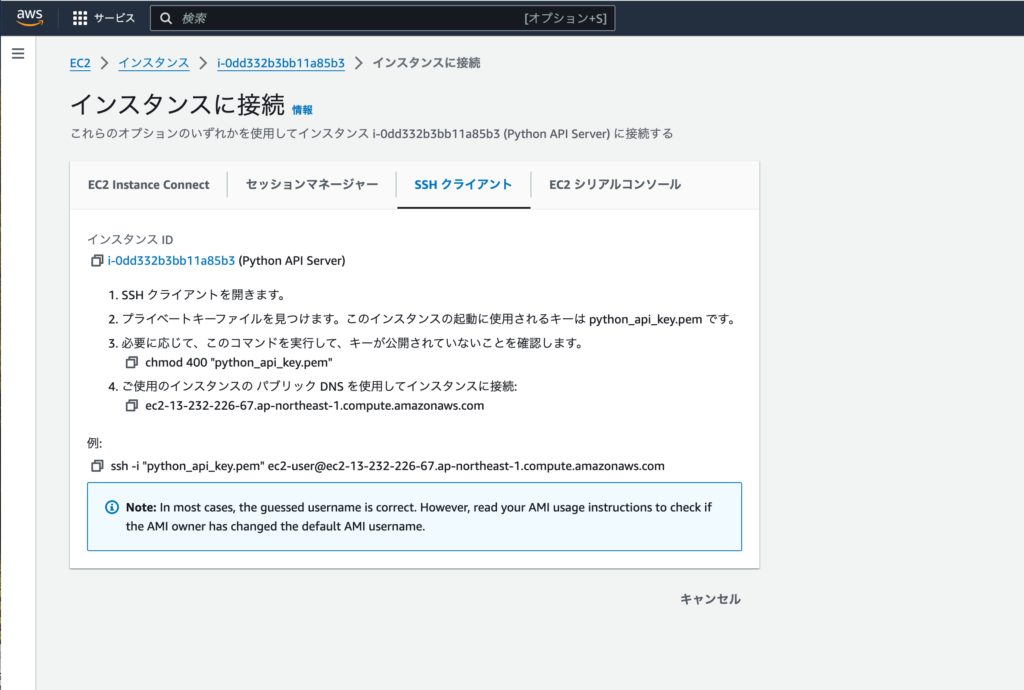
macOSを利用して表示されている手順通りに設定を行っていきます。インスタンス作成時にダウンロードしたキーファイルをここではユーザのホームディレクトリの直下にある.sshディレクトリにコピーしてchmodで400でアクセス権の変更を行います。変更後はssh -iオプションの後にキーファイルの名前を指定してec2-user@にインスタンスのパブリック IPv4 DNSの値を設定します。
% pwd
/Users/mac/.ssh
% chmod 400 python_api_key.pem
% ssh -i "python_api_key.pem" ec2-user@ec2-13-231-216-67.ap-northeast-1.compute.amazonaws.com
The authenticity of host 'ec2-13-231-216-67.ap-northeast-1.compute.amazonaws.com (13.231.216.67)' can't be established.
ED25519 key fingerprint is SHA256:SiTyTIguQrVSrMCiVx218dz2w6WqX+jCzgx3km0Rqic.
This key is not known by any other names.
Are you sure you want to continue connecting (yes/no/[fingerprint])? yes
Warning: Permanently added 'ec2-13-231-216-67.ap-northeast-1.compute.amazonaws.com' (ED25519) to the list of known hosts.
   ,     #_
   ~\_  ####_        Amazon Linux 2023
  ~~  \_#####\
  ~~     \###|
  ~~       \#/ ___   https://aws.amazon.com/linux/amazon-linux-2023
   ~~       V~' '->
    ~~~         /
      ~~._.   _/
         _/ _/
       _/m/'
Last login: Thu Feb  18 06:43:42 2024 from 3.112.23.5
EC2インスタンスに接続することができたのでここからFastAPIを構築するために必要な設定を行っていきます。
FastAPIの設定
Nginxをリバースプロキシサーバーとして使用します。NginxはオープンソースのWEBサーバです。リバースプロキシと利用した場合、Nginxはブラウザからのリクエストを受け取り、FastAPIにリクエストを転送し、FastAPIからのレスポンスをブラウザに直接返します。
Nginxのインストール
Nginxのインストールを行うためdnfコマンドを利用します。dnf -y updateコマンドでパッケージのアップデートを行っておきます。管理者権限が必要なのでコマンドの前にsudoをつけて実行しています。
$ sudo dnf -y update
Last metadata expiration check: 3:39:42 ago on Thu Feb  18 08:34:32 2024.
Dependencies resolved.
Nothing to do.
Complete!
dnf listやdnf searchコマンドを利用してnginxパッケージの情報を確認することができます。
$ sudo dnf list --available nginx
Last metadata expiration check: 3:40:42 ago on Thu Feb  18 08:34:32 2024.
Available Packages
nginx.x86_64                    1:1.24.0-1.amzn2023.0.2                                                         amazonlinux

$ sudo dnf search nginx
Last metadata expiration check: 3:41:45 ago on Thu Feb  18 08:34:32 2024.
====================================================================== Name Exactly Matched: nginx =======================================================================
nginx.x86_64 : A high performance web server and reverse proxy server
===================================================================== Name & Summary Matched: nginx ======================================================================
collectd-nginx.x86_64 : Nginx plugin for collectd
nginx-all-modules.noarch : A meta package that installs all available Nginx modules
nginx-core.x86_64 : nginx minimal core
nginx-filesystem.noarch : The basic directory layout for the Nginx server
nginx-mimetypes.noarch : MIME type mappings for nginx
nginx-mod-devel.x86_64 : Nginx module development files
nginx-mod-http-image-filter.x86_64 : Nginx HTTP image filter module
nginx-mod-http-perl.x86_64 : Nginx HTTP perl module
nginx-mod-http-xslt-filter.x86_64 : Nginx XSLT module
nginx-mod-mail.x86_64 : Nginx mail modules
nginx-mod-stream.x86_64 : Nginx stream modules
python3-certbot-nginx.noarch : The nginx plugin for certbot
”dnf install nginx”でNginxパッケージのインストールを行います。
$ sudo dnf install nginx
Last metadata expiration check: 4:14:09 ago on Thu Feb  18 08:34:32 2024.
Dependencies resolved.
==========================================================================================================================================================================
 Package                                      Architecture                    Version                                          Repository                            Size
==========================================================================================================================================================================
Installing:
 nginx                                        x86_64                          1:1.24.0-1.amzn2023.0.2                          amazonlinux                           32 k
Installing dependencies:
 generic-logos-httpd                          noarch                          18.0.0-12.amzn2023.0.3                           amazonlinux                           19 k
 gperftools-libs                              x86_64                          2.9.1-1.amzn2023.0.3                             amazonlinux                          308 k
 libunwind                                    x86_64                          1.4.0-5.amzn2023.0.2                             amazonlinux                           66 k
 nginx-core                                   x86_64                          1:1.24.0-1.amzn2023.0.2                          amazonlinux                          586 k
 nginx-filesystem                             noarch                          1:1.24.0-1.amzn2023.0.2                          amazonlinux                          9.1 k
 nginx-mimetypes                              noarch                          2.1.49-3.amzn2023.0.3                            amazonlinux                           21 k

Transaction Summary
==========================================================================================================================================================================
Install  7 Packages

Total download size: 1.0 M
Installed size: 3.4 M
Is this ok [y/N]: y
Downloading Packages:
(1/7): nginx-1.24.0-1.amzn2023.0.2.x86_64.rpm                                                                                             416 kB/s |  32 kB     00:00
(2/7): libunwind-1.4.0-5.amzn2023.0.2.x86_64.rpm                                                                                          796 kB/s |  66 kB     00:00
(3/7): nginx-core-1.24.0-1.amzn2023.0.2.x86_64.rpm                                                                                        6.0 MB/s | 586 kB     00:00
(4/7): nginx-mimetypes-2.1.49-3.amzn2023.0.3.noarch.rpm                                                                                   1.2 MB/s |  21 kB     00:00
(5/7): nginx-filesystem-1.24.0-1.amzn2023.0.2.noarch.rpm                                                                                  764 kB/s | 9.1 kB     00:00
(6/7): generic-logos-httpd-18.0.0-12.amzn2023.0.3.noarch.rpm                                                                              1.2 MB/s |  19 kB     00:00
(7/7): gperftools-libs-2.9.1-1.amzn2023.0.3.x86_64.rpm                                                                                    6.1 MB/s | 308 kB     00:00
--------------------------------------------------------------------------------------------------------------------------------------------------------------------------
Total                                                                                                                                     5.2 MB/s | 1.0 MB     00:00
Running transaction check
Transaction check succeeded.
Running transaction test
Transaction test succeeded.
Running transaction
  Preparing        :                                                                                                                                                  1/1
  Running scriptlet: nginx-filesystem-1:1.24.0-1.amzn2023.0.2.noarch                                                                                                  1/7
  Installing       : nginx-filesystem-1:1.24.0-1.amzn2023.0.2.noarch                                                                                                  1/7
  Installing       : nginx-mimetypes-2.1.49-3.amzn2023.0.3.noarch                                                                                                     2/7
  Installing       : generic-logos-httpd-18.0.0-12.amzn2023.0.3.noarch                                                                                                3/7
  Installing       : libunwind-1.4.0-5.amzn2023.0.2.x86_64                                                                                                            4/7
  Installing       : gperftools-libs-2.9.1-1.amzn2023.0.3.x86_64                                                                                                      5/7
  Installing       : nginx-core-1:1.24.0-1.amzn2023.0.2.x86_64                                                                                                        6/7
  Installing       : nginx-1:1.24.0-1.amzn2023.0.2.x86_64                                                                                                             7/7
  Running scriptlet: nginx-1:1.24.0-1.amzn2023.0.2.x86_64                                                                                                             7/7
  Verifying        : libunwind-1.4.0-5.amzn2023.0.2.x86_64                                                                                                            1/7
  Verifying        : nginx-1:1.24.0-1.amzn2023.0.2.x86_64                                                                                                             2/7
  Verifying        : nginx-core-1:1.24.0-1.amzn2023.0.2.x86_64                                                                                                        3/7
  Verifying        : gperftools-libs-2.9.1-1.amzn2023.0.3.x86_64                                                                                                      4/7
  Verifying        : nginx-mimetypes-2.1.49-3.amzn2023.0.3.noarch                                                                                                     5/7
  Verifying        : nginx-filesystem-1:1.24.0-1.amzn2023.0.2.noarch                                                                                                  6/7
  Verifying        : generic-logos-httpd-18.0.0-12.amzn2023.0.3.noarch                                                                                                7/7

Installed:
  generic-logos-httpd-18.0.0-12.amzn2023.0.3.noarch          gperftools-libs-2.9.1-1.amzn2023.0.3.x86_64          libunwind-1.4.0-5.amzn2023.0.2.x86_64
  nginx-1:1.24.0-1.amzn2023.0.2.x86_64                       nginx-core-1:1.24.0-1.amzn2023.0.2.x86_64            nginx-filesystem-1:1.24.0-1.amzn2023.0.2.noarch
  nginx-mimetypes-2.1.49-3.amzn2023.0.3.noarch

Complete!
インストール後はインストールしたnginxのバージョンの確認します。
$ nginx -v
nginx version: nginx/1.24.0
Nginxの起動
Nginxをsystemctl enableを起動してOSの再起動を行っても自動起動できるように設定を行います。
$ sudo systemctl enable nginx
Created symlink /etc/systemd/system/multi-user.target.wants/nginx.service → /usr/lib/systemd/system/nginx.service.
systemctl startコマンドでNginxを起動してステータスを確認します。
$ sudo systemctl start nginx
$ sudo systemctl status nginx
● nginx.service - The nginx HTTP and reverse proxy server
     Loaded: loaded (/usr/lib/systemd/system/nginx.service; enabled; preset: disabled)
     Active: active (running) since Thu 2024-02-01 12:51:35 UTC; 6s ago
    Process: 27077 ExecStartPre=/usr/bin/rm -f /run/nginx.pid (code=exited, status=0/SUCCESS)
    Process: 27078 ExecStartPre=/usr/sbin/nginx -t (code=exited, status=0/SUCCESS)
    Process: 27079 ExecStart=/usr/sbin/nginx (code=exited, status=0/SUCCESS)
   Main PID: 27080 (nginx)
      Tasks: 2 (limit: 1114)
     Memory: 2.2M
        CPU: 58ms
     CGroup: /system.slice/nginx.service
             ├─27080 "nginx: master process /usr/sbin/nginx"
             └─27081 "nginx: worker process"

Feb 18 12:51:35 ip-172-31-10-154.ap-northeast-1.compute.internal systemd[1]: Starting nginx.service - The nginx HTTP and reverse proxy server...
Feb 18 12:51:35 ip-172-31-10-154.ap-northeast-1.compute.internal nginx[27078]: nginx: the configuration file /etc/nginx/nginx.conf syntax is ok
Feb 18 12:51:35 ip-172-31-10-154.ap-northeast-1.compute.internal nginx[27078]: nginx: configuration file /etc/nginx/nginx.conf test is successful
Feb 18 12:51:35 ip-172-31-10-154.ap-northeast-1.compute.internal systemd[1]: Started nginx.service - The nginx HTTP and reverse proxy server
http://EC2インスタンスのパブリックIPアドレスをブラウザのURLに設定して接続するとデフォルトのindex.htmlファイルが表示されます。ここまでの設定でNginxをWEBサーバとして利用することができます。
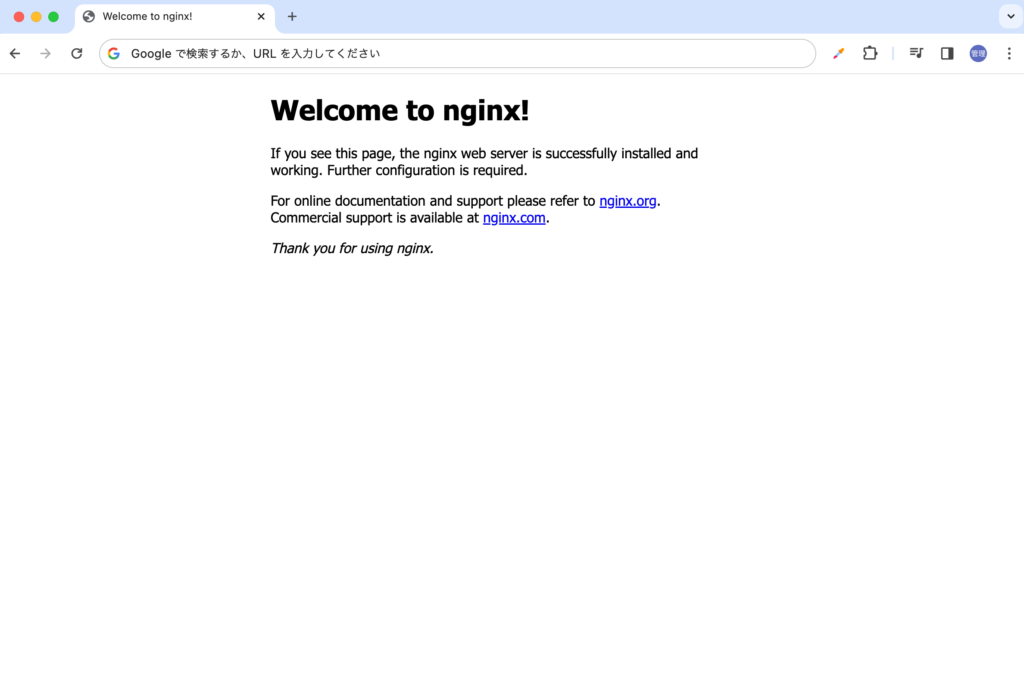
ブラウザ上に表示されているページは/usr/share/nginx/html/index.htmlファイルなのでコードを更新するとブラウザに表示される内容が更新されます。
<!DOCTYPE html>
<html>
<head>
<title>Welcome to nginx!</title>
<style>
html { color-scheme: light dark; }
body { width: 35em; margin: 0 auto;
font-family: Tahoma, Verdana, Arial, sans-serif; }
</style>
</head>
<body>
<h1>Welcome to nginx!</h1>
<p>f you see this page, the nginx web server is successfully installed and
working. Further configuration is required.</p>

<p>For online documentation and support please refer to
<a href="http://nginx.org/">nginx.org</a>.<br/>
Commercial support is available at
<a href="http://nginx.com/">nginx.com</a>.</p>

<p><em>Thank you for using nginx.</em></p>
</body>
</html>
Nginxのログは/var/log/nginxの下に保存されています。/var/log/nginxに移動するためにはrootの権限が必要となるため”sudo su -で”rootに変更してログを確認ことができます。
$ sudo su -
Last login: Thu Feb  1 13:01:26 UTC 2024 on pts/0
FastAPIのインストール
ec2-userのホームディレクトリの直下にプロジェクトディレクトリphthon_fastapiを作成します。
[ec2-user@ip-172-31-10-154 ~]$ mkdir python_fastapi
[ec2-user@ip-172-31-10-154 ~]$ cd python_fastapi/
Pythonの仮想環境の設定を行います。”python3 -m venv env”を実行すると実行したディレクトリにenvディレクトリが作成されます。仮想環境を有効化するために”source env/bin/active”コマンドを実行します。有効化されるとコマンドのプロンプトの前に(env)が表示されます。
[ec2-user@ip-172-31-10-154 python_fastapi]$ python3 -m venv env
[ec2-user@ip-172-31-10-154 python_fastapi]$ ls
env
[ec2-user@ip-172-31-10-154 python_fastapi]$ source env/bin/activate
(env) [ec2-user@ip-172-31-10-154 python_fastapi]$ which pip
~/python_fastapi/env/bin/pip
“pip list”コマンドを利用してインストールされているパッケージを確認します。実行するとpipのバージョンアップを促されるのでpipのバージョンをアップするためにpipのupgradeを行っています。
(env) [ec2-user@ip-172-31-10-154 python_fastapi]$ pip list
Package    Version
---------- -------
pip        21.3.1
setuptools 59.6.0
WARNING: You are using pip version 21.3.1; however, version 23.3.2 is available.
You should consider upgrading via the '/home/ec2-user/python_fastapi/env/bin/python3 -m pip install --upgrade pip' command.
(env) [ec2-user@ip-172-31-10-154 python_fastapi]$ /home/ec2-user/python_fastapi/env/bin/python3 -m pip install --upgrade pip
Requirement already satisfied: pip in ./env/lib/python3.9/site-packages (21.3.1)
Collecting pip
  Downloading pip-23.3.2-py3-none-any.whl (2.1 MB)
     |████████████████████████████████| 2.1 MB 5.1 MB/s
Installing collected packages: pip
  Attempting uninstall: pip
    Found existing installation: pip 21.3.1
    Uninstalling pip-21.3.1:
      Successfully uninstalled pip-21.3.1
Successfully installed pip-23.3.2
FastAPIのインストールを行います。
$ pip install fastapi
Collecting fastapi
  Downloading fastapi-0.109.0-py3-none-any.whl.metadata (24 kB)
//略
Successfully installed annotated-types-0.6.0 anyio-4.2.0 exceptiongroup-1.2.0 fastapi-0.109.0 idna-3.6 pydantic-2.6.0 pydantic-core-2.16.1 sniffio-1.3.0 starlette-0.35.1 typing-extensions-4.9.0
ASGI serverとして利用するuvicornのインストールも行います。FastAPI単独ではHTTPサーバの機能をもっていないためuvicornが必要となります。uvicornはHTTPリクエストを受け取り、それをFastAPIアプリケーションに渡す役割を果たします。
$ pip install "uvicorn[standard]"
Collecting uvicorn[standard]
  Downloading uvicorn-0.27.0.post1-py3-none-any.whl.metadata (6.4 kB)
//略
Successfully installed click-8.1.7 h11-0.14.0 httptools-0.6.1 python-dotenv-1.0.1 pyyaml-6.0.1 uvicorn-0.27.0.post1 uvloop-0.19.0 watchfiles-0.21.0 websockets-12.0
Nginxの設定
Nginxの設定ファイルは/etc/nginx/nginx.confですが、リバースプロキシを設定するためにsites-availableディレクトリに追加ファイルを作成して設定を行いまます。
リバースプロキシを設定することでユーザからのリクエストは下記のようになります。
- ユーザがブラウザでhttp://127.0.0.1にアクセス、リクエストはNginxに送信
- NginxがリクエストをFastAPIの起動ポートであるhttp://127.0.0.1:8000に転送
- FastAPIがリクエストを受け取り、FastAPIがレスポンスを生成し、Nginxを通してユーザに返信
# For more information on configuration, see:
#   * Official English Documentation: http://nginx.org/en/docs/
#   * Official Russian Documentation: http://nginx.org/ru/docs/

user nginx;
worker_processes auto;
error_log /var/log/nginx/error.log notice;
pid /run/nginx.pid;

# Load dynamic modules. See /usr/share/doc/nginx/README.dynamic.
include /usr/share/nginx/modules/*.conf;

events {
    worker_connections 1024;
}

http {
    log_format  main  '$remote_addr - $remote_user [$time_local] "$request" '
                      '$status $body_bytes_sent "$http_referer" '
                      '"$http_user_agent" "$http_x_forwarded_for"';

    access_log  /var/log/nginx/access.log  main;

    sendfile            on;
    tcp_nopush          on;
    keepalive_timeout   65;
    types_hash_max_size 4096;

    include             /etc/nginx/mime.types;
    default_type        application/octet-stream;

    # Load modular configuration files from the /etc/nginx/conf.d directory.
    # See http://nginx.org/en/docs/ngx_core_module.html#include
    # for more information.
    include /etc/nginx/conf.d/*.conf;

    server {
        listen       80;
        listen       [::]:80;
        server_name  _;
        root         /usr/share/nginx/html;

        # Load configuration files for the default server block.
        include /etc/nginx/default.d/*.conf;

        error_page 404 /404.html;
        location = /404.html {
        }

        error_page 500 502 503 504 /50x.html;
        location = /50x.html {
        }
    }

# Settings for a TLS enabled server.
#
#    server {
#        listen       443 ssl http2;
#        listen       [::]:443 ssl http2;
#        server_name  _;
#        root         /usr/share/nginx/html;
#
#        ssl_certificate "/etc/pki/nginx/server.crt";
#        ssl_certificate_key "/etc/pki/nginx/private/server.key";
#        ssl_session_cache shared:SSL:1m;
#        ssl_session_timeout  10m;
#        ssl_ciphers PROFILE=SYSTEM;
#        ssl_prefer_server_ciphers on;
#
#        # Load configuration files for the default server block.
#        include /etc/nginx/default.d/*.conf;
#
#        error_page 404 /404.html;
#        location = /404.html {
#        }
#
#        error_page 500 502 503 504 /50x.html;
#        location = /50x.html {
#        }
#    }

}
/etc/nginxディレクトリにsites-availableディレクトリ、sites-enabledディレクトを作成します。
 $ sudo mkdir sites-available
 $ sudo mkdir sites-enabled
sites-avaliableディレクトリにfastapi.confファイルを作成して以下のよう内容を記述します。
server {
        listen 80;
        server_name _;
        location / {
                proxy_pass http://127.0.0.1:8000
        }
作成したfastapi.confファイルをsites-enabledにシンボリックリンクを貼ります。
$ sudo ln -s /etc/nginx/sites-available/fastapi.conf /etc/nginx/sites-enabled/
nginx.confファイルでsites-enabled以下のファイルが読み込まれるようにincludeを追加します。
include /etc/nginx/sites-enabled/*;
設定が完了したら設定した内容を反映させるためにNginxのサービスの再起動を行います。
$ sudo systemctl restart nginx
FastAPIの動作確認
FastAPIのインストール、Nginxでのリバースプロキシの設定が完了したのでFastAPIのコードを記述して動作確認を行います。
python_fastapiディレクトリにmain.pyファイルを作成します。コードはFastAPIのドキュメントのExampleを利用しています。”/”にアクセスがあるとJSONを戻すシンプルなコードです。
from typing import Union

from fastapi import FastAPI

app = FastAPI()

@app.get("/")
def read_root():
    return {"Hello": "World"}
FastAPIはunicornを利用して起動を行います。
(env) [ec2-user@ip-172-31-10-154 python_fastapi]$ uvicorn main:app --reload
INFO:     Will watch for changes in these directories: ['/home/ec2-user/python_fastapi']
INFO:     Uvicorn running on http://127.0.0.1:8000 (Press CTRL+C to quit)
INFO:     Started reloader process [31429] using WatchFiles
INFO:     Started server process [31431]
INFO:     Waiting for application startup.
INFO:     Application startup complete.
INFO:     127.0.0.1:54208 - "GET / HTTP/1.0" 200 OK
ブラウザからEC2のパブリックIPアドレスに対してアクセスを行うとブラウザ上には{“Hello”:”World”}の文字列が表示されます。
サービスの登録
FastAPIをEC2のインスタンスの起動と同時にサービスとして自動起動できるようにサービスへの登録を行います。
/etc/systemd/systemディレクトリにfastapi.serviceを作成して以下のコードを記述します。
[Unit]
Description=FastAPI App
After=network.target

[Service]
ExecStart=/home/ec2-user/python_fastapi/env/bin/uvicorn main:app --host 127.0.0.1 --port 8000
WorkingDirectory=/home/ec2-user/python_fastapi
Restart=always

[Install]
WantedBy=multi-user.target
systemctl startコマンドを利用して作成したFastAPIサービスの起動を行います。
$ sudo systemctl start fastapi.service
systemctl statusコマンドでfastapi.serviceが正常に動作していることを確認します。
$ sudo systemctl status fastapi.service
● fastapi.service - FastAPI App
     Loaded: loaded (/etc/systemd/system/fastapi.service; disabled; preset: disabled)
     Active: active (running) since Fri 2024-02-18 14:30:59 UTC; 10min ago
   Main PID: 5232 (uvicorn)
      Tasks: 7 (limit: 1114)
     Memory: 65.8M
        CPU: 1.986s
     CGroup: /system.slice/fastapi.service
             └─5232 /home/ec2-user/python_fastapi/env/bin/python3 /home/ec2-user/python_fastapi/env/bin/uvicorn main:app --host 127.0.0.1 --port 8000

Feb 18 14:30:59 ip-172-31-10-154.ap-northeast-1.compute.internal systemd[1]: Started fastapi.service - FastAPI App.
Feb 18 14:31:00 ip-172-31-10-154.ap-northeast-1.compute.internal uvicorn[5232]: INFO:     Started server process [5232]
Feb 18 14:31:00 ip-172-31-10-154.ap-northeast-1.compute.internal uvicorn[5232]: INFO:     Waiting for application startup.
Feb 18 14:31:00 ip-172-31-10-154.ap-northeast-1.compute.internal uvicorn[5232]: INFO:     Application startup complete.
起動していることを確認後、自動起動できるようにsystemctl enableコマンドを実行します。
$ sudo systemctl enable fastapi.service
Created symlink /etc/systemd/system/multi-user.target.wants/fastapi.service → /etc/systemd/system/fastapi.service.

$ sudo systemctl is-enabled fastapi.service
enabled
サービスを登録後はEC2インスタンスの再起動を行っても自動で起動が行われます。さらにkillコマンドでFastAPIのプロセスを停止しても自動で再起動が行われます。
ここまでの設定でFastAPIアプリケーションをEC2上で構築することができたので本格的なアプリケーションを構築するためにFastAPIへのルーティングの追加するなど機能追加を行っていく必要があります。
ECインスタンスをLambda関数を利用して起動したい場合にはこちらの記事が参考になります。