LaravelでLaravel UIパッケージを利用して認証設定(CSSはbootstrap)
Laraveで認証機能を実装する時にどのツールを利用していますか?Laravel BreezeですかLaravel Jetstreamですか。それともLaravel UIですか。数年前からLaravelを利用し始めた人の中にはLaravel UIという名前を知らない人もいるかもしれません。Laravel UIはLaravelのバージョン6から登場しFrontend Scaffoldingとしてドキュメントにインストール方法が記述されていましたがLaravel8からJetstream, Breezeが登場しドキュメントには記載されなくなりました。
Laravelのドキュメントにはその名前さえ記述されてなくなってしまいましがが、最新バージョンのLaravel(現在はLaravel11)でも認証ライブラリのLaravel UIパッケージを利用することができます。現在もメンテナンスが行われておりビルドツールにはViteもサポートしています。
Laravel8からは認証機能を利用する場合にはLaravel BreezeまたはLaravel Jetstreamパッケージをインストールする必要があります。Breezeパッケージを利用するためにはInertia.js(Vue, React), Livewire、Alpine.js、JetsreamパッケージではInertia.js(Vue)またはLivewireの知識が必要となり、CSSにはTailwind CSSが利用されています。しかしLaravel UIではCSSにTailwind CSSではなくBootstrapを利用しています。Vue, Reactを選択することができますが必須ではありません。Scaffoldingの画面にはBlade Templateのみを利用しているのでJavaScriptを利用して動きのあるページを作成する必要がない人におすすめのライブラリです。
本文書では最新版のLaravel11のプロジェクトを作成して、Vue, Reactをインストールしない場合とVueをインストールした場合の動作確認を行っています。
目次
Laravelプロジェクトの作成
composerコマンドを利用してLaravel 11のインストールを行います。laravel_11_uiというプロジェクト名をつけていますが任意の名前を設定することができます。
% composer create-project --prefer-dist laravel/laravel laravel_11_ui
Lravel UIのインストールと設定
Laravel UIパッケージのインストールを行います。動作確認時のlaravel/uiのバージョンは4.5でした。
 % omposer require laravel/ui
./composer.json has been updated
Running composer update laravel/ui
Loading composer repositories with package information
Updating dependencies
Lock file operations: 1 install, 0 updates, 0 removals
  - Locking laravel/ui (v4.5.2)
Writing lock file
Installing dependencies from lock file (including require-dev)
Package operations: 1 install, 0 updates, 0 removals
  - Downloading laravel/ui (v4.5.2)
  - Installing laravel/ui (v4.5.2): Extracting archive
Generating optimized autoload files
> Illuminate\Foundation\ComposerScripts::postAutoloadDump
> @php artisan package:discover --ansi

   INFO  Discovering packages.

  laravel/sail ........................ DONE
  laravel/tinker ...................... DONE
  laravel/ui .......................... DONE
  nesbot/carbon ....................... DONE
  nunomaduro/collision ................ DONE
  nunomaduro/termwind ................. DONE

79 packages you are using are looking for funding.
Use the `composer fund` command to find out more!
> @php artisan vendor:publish --tag=laravel-assets --ansi --force

   INFO  No publishable resources for tag [laravel-assets].
bootstrapを選択した場合
認証のScaffolding(骨組み:認証画面やログイン画面など)を作成するためにphp artisan uiコマンドを実行します。Vue.jsやReactを利用したい場合にはvue、reactを指定することができますが最初はbootstrapを指定します。
 % php artisan ui bootstrap --auth
  The [Controller.php] file already exists. Do you want to replace it? (yes/no) [no]
❯

   INFO  Authentication scaffolding generated successfully.

   INFO  Vue scaffolding installed successfully.

   WARN  Please run [npm install && npm run dev] to compile your fresh scaffolding.
“npm install && npm run dev”を実行する前にどのようなJavaScriptのライブラリがインストールされるのかpackage.jsonで確認することができます。bootstrapやviteなどを確認することができます。
{
    "private": true,
    "type": "module",
    "scripts": {
        "dev": "vite",
        "build": "vite build"
    },
    "devDependencies": {
        "@popperjs/core": "^2.11.6",
        "axios": "^1.6.4",
        "bootstrap": "^5.2.3",
        "laravel-vite-plugin": "^1.0",
        "sass": "^1.56.1",
        "vite": "^5.0"
    }
}
“npm install && npm run dev”を実行して追加のパッケージのインストールを行うようにメッセージが表示されるので指示通りインストールを行います。実行するとViteの開発サーバが起動します。php artisan serveで起動するLaravelの開発サーバとは異なります。
 % npm install && npm run dev
//略
  VITE v5.3.5  ready in 823 ms

  ➜  Local:   http://localhost:5173/
  ➜  Network: use --host to expose
  ➜  press h + enter to show help

  LARAVEL v11.19.0  plugin v1.0.5

  ➜  APP_URL: http://localhost
php artisan serveコマンドで開発サーバを起動します。
 % php artisan serve

   INFO  Server running on [http://127.0.0.1:8000].

  Press Ctrl+C to stop the server
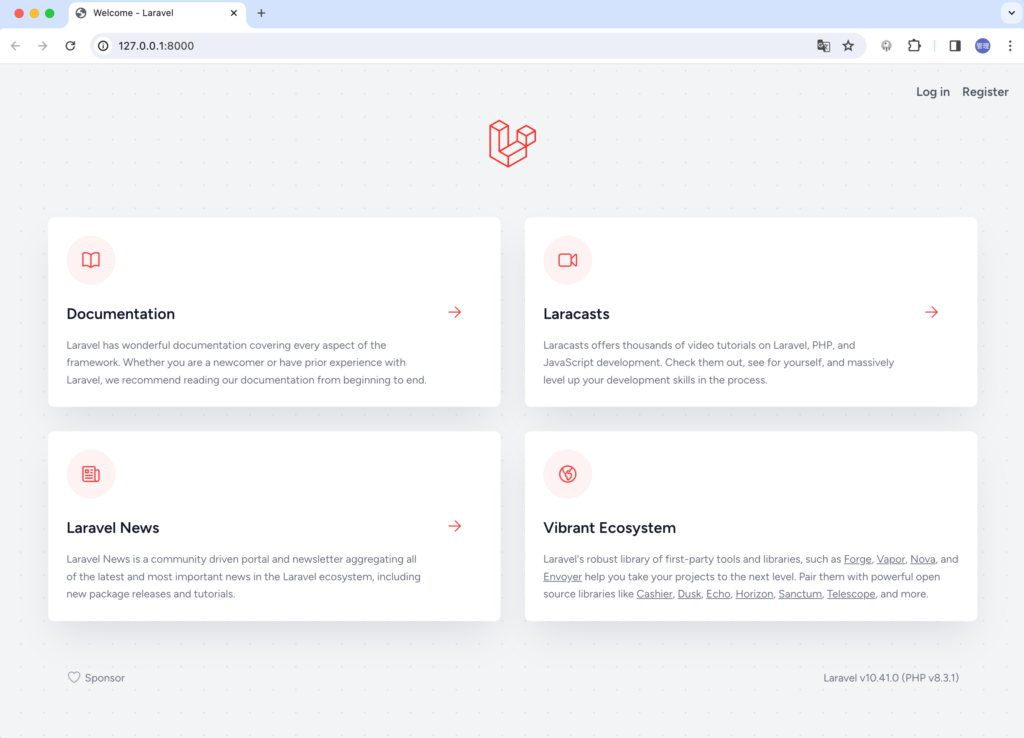
開発サーバが起動すると画面右上に認証に利用するLoginとRegisterのリンクが表示されます。Laravel UIをインストールしていない場合にはLogin,Registerのリンクは表示されません。
Registerのリンクをクリックするとユーザの登録フォームが表示されます。データベースの設定を行っていないのでユーザ登録を行うことはできません。
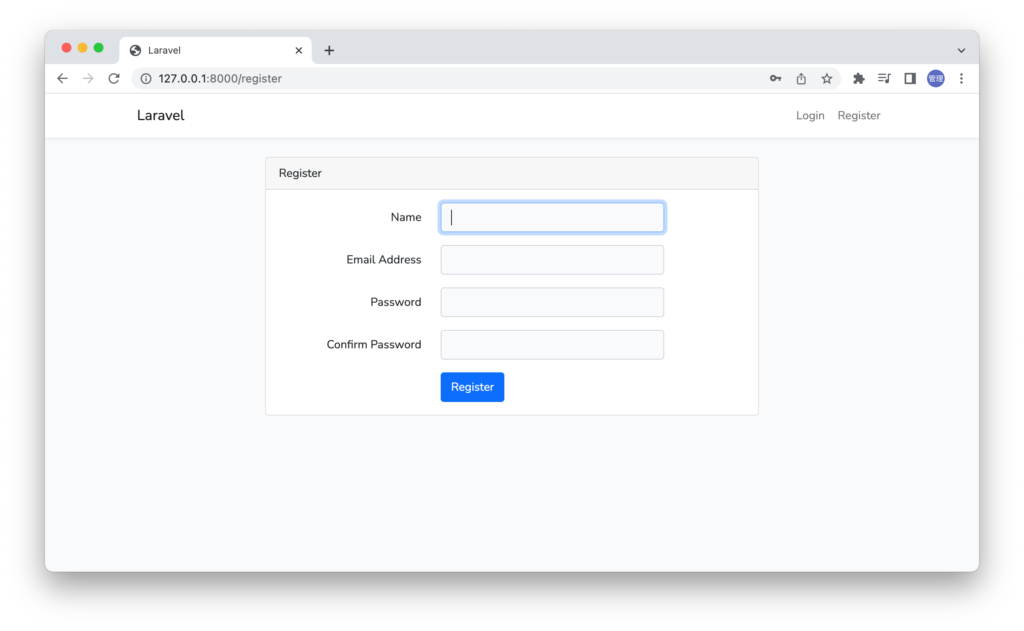
ユーザ登録やログインの認証、ログイン後の画面のBladeファイルはresouces¥viewsディレクトリの下に保存されています。
register.blade.phpファイルを確認するとBlade TemplateとbootstrapのCSSのみを利用して記述されていることが確認できます。
@extends('layouts.app')

@section('content')
<div class="container">
    <div class="row justify-content-center">
        <div class="col-md-8">
            <div class="card">
                <div class="card-header">{{ __('Register') }}</div>

                <div class="card-body">
                    <form method="POST" action="{{ route('register') }}">
                        @csrf

                        <div class="row mb-3">
                            <label for="name" class="col-md-4 col-form-label text-md-end">{{ __('Name') }}</label>

                            <div class="col-md-6">
                                <input id="name" type="text" class="form-control @error('name') is-invalid @enderror" name="name" value="{{ old('name') }}" required autocomplete="name" autofocus>

                                @error('name')
                                    <span class="invalid-feedback" role="alert">
                                        <strong>{{ $message }}</strong>
                                    </span>
                                @enderror
                            </div>
                        </div>

                        <div class="row mb-3">
                            <label for="email" class="col-md-4 col-form-label text-md-end">{{ __('Email Address') }}</label>

                            <div class="col-md-6">
                                <input id="email" type="email" class="form-control @error('email') is-invalid @enderror" name="email" value="{{ old('email') }}" required autocomplete="email">

                                @error('email')
                                    <span class="invalid-feedback" role="alert">
                                        <strong>{{ $message }}</strong>
                                    </span>
                                @enderror
                            </div>
                        </div>

                        <div class="row mb-3">
                            <label for="password" class="col-md-4 col-form-label text-md-end">{{ __('Password') }}</label>

                            <div class="col-md-6">
                                <input id="password" type="password" class="form-control @error('password') is-invalid @enderror" name="password" required autocomplete="new-password">

                                @error('password')
                                    <span class="invalid-feedback" role="alert">
                                        <strong>{{ $message }}</strong>
                                    </span>
                                @enderror
                            </div>
                        </div>

                        <div class="row mb-3">
                            <label for="password-confirm" class="col-md-4 col-form-label text-md-end">{{ __('Confirm Password') }}</label>

                            <div class="col-md-6">
                                <input id="password-confirm" type="password" class="form-control" name="password_confirmation" required autocomplete="new-password">
                            </div>
                        </div>

                        <div class="row mb-0">
                            <div class="col-md-6 offset-md-4">
                                <button type="submit" class="btn btn-primary">
                                    {{ __('Register') }}
                                </button>
                            </div>
                        </div>
                    </form>
                </div>
            </div>
        </div>
    </div>
</div>
@endsection
データベースの設定
本文書では簡易的なSQLiteデータベースを利用します。Laravel11ではデフォルトでSQLiteのデータベースが指定され、データベースが作成されているので.envファイルのDBに関する環境変数を変更する必要がありませんが他のバージョンであれば.envファイルの変更が必要です。
Laravel10以前の.envの設定
.envファイルではDB_CONNECTIONをmysqlからsqliteに変更し、その他のDBに関連する環境変数をコメントします。コメントする環境変数は先頭にDB_がついているものです
DB_CONNECTION=sqlite
# DB_HOST=127.0.0.1
# DB_PORT=3306
# DB_DATABASE=laravel
# DB_USERNAME=root
# DB_PASSWORD=
これでデータベースの設定が完了できたので、php artisan migrateコマンドを実行してください。SQLiteはファイルベースのデータベースなのでファイルが存在しない場合には警告が表示され、ファイルを作成するか聞かれるので”Yes”を選択します。実行が完了すると5つのテーブルが作成されます。
 % php artisan migrate

   WARN  The SQLite database does not exist: database/database.sqlite.

 ┌ Would you like to create it? ────────────────────────────────┐
 │ Yes                                                          │
 └──────────────────────────────────────────────────────────────┘

   INFO  Preparing database.

  Creating migration table ................................. 8ms DONE

   INFO  Running migrations.

  2014_10_12_000000_create_users_table ...................... 3ms DONE
  2014_10_12_100000_create_password_reset_tokens_table ...... 1ms DONE
  2014_10_12_200000_add_two_factor_columns_to_users_table ... 3ms DONE
  2019_08_19_000000_create_failed_jobs_table ................ 2ms DONE
  2019_12_14_000001_create_personal_access_tokens_table ..... 3ms DONE
テーブルの作成が正常に完了したらユーザ登録画面からユーザの登録を行ってください。
ユーザの登録
ユーザの登録画面からユーザ登録を行ってください。ユーザの登録が完了するとLaravelのログインが行われるので下記の初期画面が表示されます。画面はBootstrapのclassを使って構築されています。
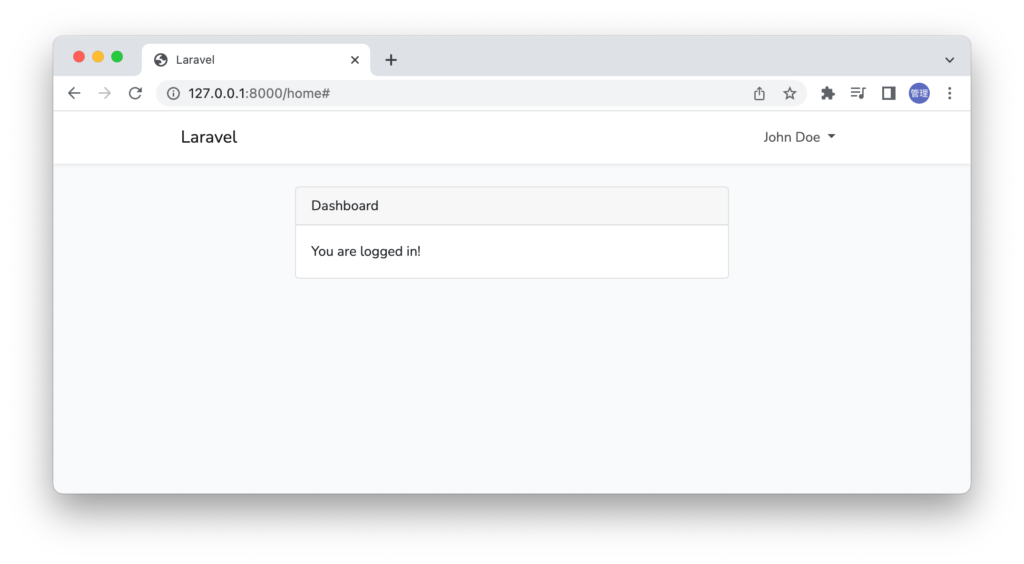
Laravel UIを利用することで認証機能を追加することができました。
ここからLaravelのアプリケーションを構築することになります。
Vueを選択した場合
bootstapではなくvueを選択した場合の違いを確認しておきます。LaravelとLaravel UIパッケージまでのインストールは同じですが 認証のScaffoldingを作成するために実行するphp artisan uiコマンドでvueを指定します。
 % php artisan ui vue --auth
  The [Controller.php] file already exists. Do you want to replace it? (yes/no) [no]
❯

   INFO  Authentication scaffolding generated successfully.

   INFO  Vue scaffolding installed successfully.

   WARN  Please run [npm install && npm run dev] to compile your fresh scaffolding.
package.jsonファイルを確認するとvueのバージョン3がインストールされることが確認できます。
{
    "private": true,
    "type": "module",
    "scripts": {
        "dev": "vite",
        "build": "vite build"
    },
    "devDependencies": {
        "@popperjs/core": "^2.11.6",
        "@vitejs/plugin-vue": "^4.5.0",
        "axios": "^1.6.4",
        "bootstrap": "^5.2.3",
        "laravel-vite-plugin": "^1.0",
        "sass": "^1.56.1",
        "vite": "^5.0",
        "vue": "^3.2.37"
    }
}
“npm install && npm run dev”コマンドを実行します。
 % npm install && npm run dev
 //略
  VITE v5.3.5  ready in 276 ms

  ➜  Local:   http://localhost:5173/
  ➜  Network: use --host to expose
  ➜  press h + enter to show help

  LARAVEL v11.19.0  plugin v1.0.5

  ➜  APP_URL: http://localhost
ユーザ登録画面やログイン画面などはbootstrapを指定した時と同じですが、resouces¥js¥app.jsファイルを見ると違いを確認することができます。bootstrapを指定した場合は先頭のrequire(‘./bootstrap’)のみが記述されていますがvueを指定した場合にはVueの関する設定が記述されています。
/**
* First we will load all of this project's JavaScript dependencies which
* includes Vue and other libraries. It is a great starting point when
* building robust, powerful web applications using Vue and Laravel.
*/
import './bootstrap';
import { createApp } from 'vue';
/**
* Next, we will create a fresh Vue application instance. You may then begin
* registering components with the application instance so they are ready
* to use in your application's views. An example is included for you.
*/
const app = createApp({});
import ExampleComponent from './components/ExampleComponent.vue';
app.component('example-component', ExampleComponent);
/**
* The following block of code may be used to automatically register your
* Vue components. It will recursively scan this directory for the Vue
* components and automatically register them with their "basename".
*
* Eg. ./components/ExampleComponent.vue -> Laravel10以前の場合はBootstrapの時と同様にSQLiteを利用してデータベースの作成を行います。
データベースの設定
本文書では簡易的なSQLiteデータベースを利用します。.envファイルのDBに関する環境変数を変更します。
.envファイルではDB_CONNECTIONをmysqlからsqliteに変更し、その他のDBに関連する環境変数を削除します。削除する環境変数は先頭にDB_がついているものです
DB_CONNECTION=sqlite
これでデータベースの設定が完了できたので、php artisan migrateコマンドを実行してください。SQLiteはファイルベースのデータベースなのでファイルが存在しない場合には警告が表示され、ファイルを作成するか聞かれるので”Yes”を選択します。実行が完了すると5つのテーブルが作成されます。
 % php artisan migrate

   WARN  The SQLite database does not exist: database/database.sqlite.

 ┌ Would you like to create it? ────────────────────────────────┐
 │ Yes                                                          │
 └──────────────────────────────────────────────────────────────┘

   INFO  Preparing database.

  Creating migration table ................................. 8ms DONE

   INFO  Running migrations.

  2014_10_12_000000_create_users_table ...................... 3ms DONE
  2014_10_12_100000_create_password_reset_tokens_table ...... 1ms DONE
  2014_10_12_200000_add_two_factor_columns_to_users_table ... 3ms DONE
  2019_08_19_000000_create_failed_jobs_table ................ 2ms DONE
  2019_12_14_000001_create_personal_access_tokens_table ..... 3ms DONE
データベースの作成が完了してユーザの登録を行いLaravelのログインを行ってください。先ほどと同様にDashboardが表示されます。この画面はresource¥views¥home.blade.phpファイルに記述されています。

app.jsファイルの中でExampleComponentコンポーネントがVueに登録されているのでhome.blade.phpファイルの中でExampleComponentコンポーネントをブラウザ上に表示することができます。
@extends('layouts.app')

@section('content')
<div class="container">
    <div class="row justify-content-center">
        <div class="col-md-8">
            <div class="card">
                <div class="card-header">{{ __('Dashboard') }}</div>

                <div class="card-body">
                    @if (session('status'))
                        <div class="alert alert-success" role="alert">
                            {{ session('status') }}
                        </div>
                    @endif

                    {{ __('You are logged in!') }}
                </div>
            </div>
        </div>
        <example-component />
    </div>
</div>
@endsection
ブラウザで確認するとExample Componentが表示されています。
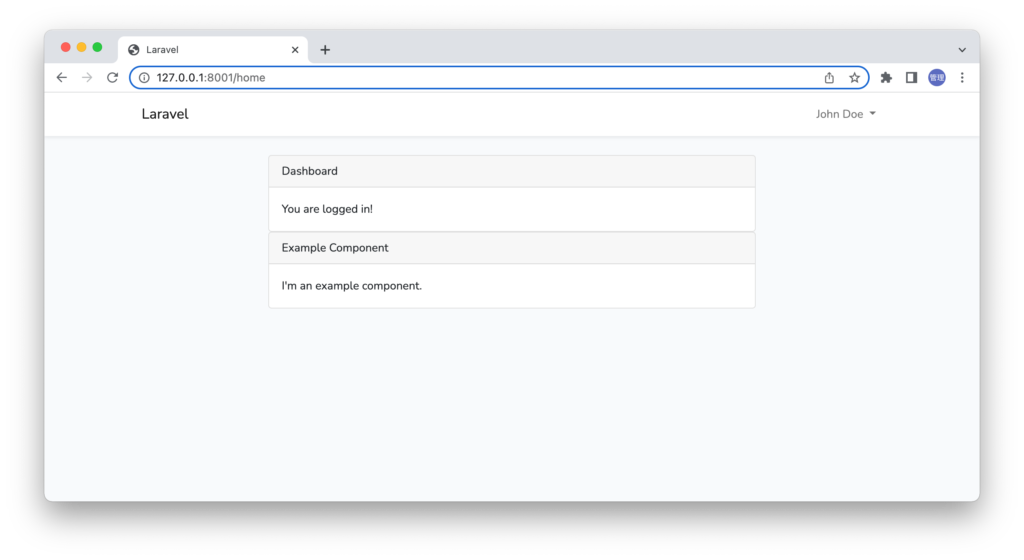
ExampleComponent.vueファイルの中身を確認して見るとOptions APIを利用して下記のように記述されています。ExampleComponent.vueファイルはSingle File Componentsと呼ばれtemplate, ロジック、スタイルを設定することができます。templateタグの中身がブラウザに表示される内容です。scriptタグの中にJavaScriptを利用してコードを記述することができます。ExampleComponent.vueファイルではスタイルの設定は行っていません。
<template>
    <div class="container">
        <div class="row justify-content-center">
            <div class="col-md-8">
                <div class="card">
                    <div class="card-header">Example Component</div>

                    <div class="card-body">
                        I'm an example component.
                    </div>
                </div>
            </div>
        </div>
    </div>
</template>

<script>
    export default {
        mounted() {
            console.log('Component mounted.')
        }
    }
</script>
画面への描写だけではなくライフサイクルフックのmountedにconsole.logが記述されているのでExampleComponentを利用した場合はブラウザのデベロッパーツールのコンソールに”Component mounted.”が表示されます。
複数のコンポーネントの表示
ExampleComponent以外のコンポーネントを表示させたい場合の方法を確認しておきます。resouces¥jsフォルダの中にUserList.vueファイルを作成してExampleComponent.vueファイルの内容を元に下記を記述します。
<template>
    <div class="container">
        <div class="row justify-content-center">
            <div class="col-md-8">
                <div class="card">
                    <div class="card-header">User List</div>

                    <div class="card-body">I'm an example component.</div>
                </div>
            </div>
        </div>
    </div>
</template>

<script>
export default {
    mounted() {
        console.log("Component mounted.");
    },
};
</script>
ファイルを作成しただけではBladeファイル内で利用することはできません。利用するためには作成したコンポーネントをVueに登録する必要があります。ExampleComponent.vueファイルはVue.componentによって登録されていましたがコンポーネントを作成するたびに行を追加するのは非効率なのでjsフォルダ下にある.vueの拡張子がついたコンポーネントをVueに登録できるように設定を行います。その設定が事前に準備されておりデフォルトではコメントされていますがそれを外しています。
// import ExampleComponent from "./components/ExampleComponent.vue";
// app.component("example-component", ExampleComponent);

Object.entries(import.meta.glob("./**/*.vue", { eager: true })).forEach(
    ([path, definition]) => {
        app.component(
            path
                .split("/")
                .pop()
                .replace(/\.\w+$/, ""),
            definition.default
        );
    }
);
この設定でExampleComponent.vueとUserList.vueを登録することができます。Home.blade.phpファイルに登録したExampleComponent.vueとUserList.vueを追加します。
@extends('layouts.app')

@section('content')
<div class="container">
    <div class="row justify-content-center">
        <div class="col-md-8">
            <div class="card">
                <div class="card-header">{{ __('Dashboard') }}</div>

                <div class="card-body">
                    @if (session('status'))
                        <div class="alert alert-success" role="alert">
                            {{ session('status') }}
                        </div>
                    @endif

                    {{ __('You are logged in!') }}
                </div>
            </div>
        </div>
        <div>
            <example-component />
        </div>
        <div>
            <user-list />
        </div>
    </div>
</div>
@endsection
JavaScriptファイルを更新した場合はビルドを行う必要があるのでnpm run devコマンドを実行しておきます。
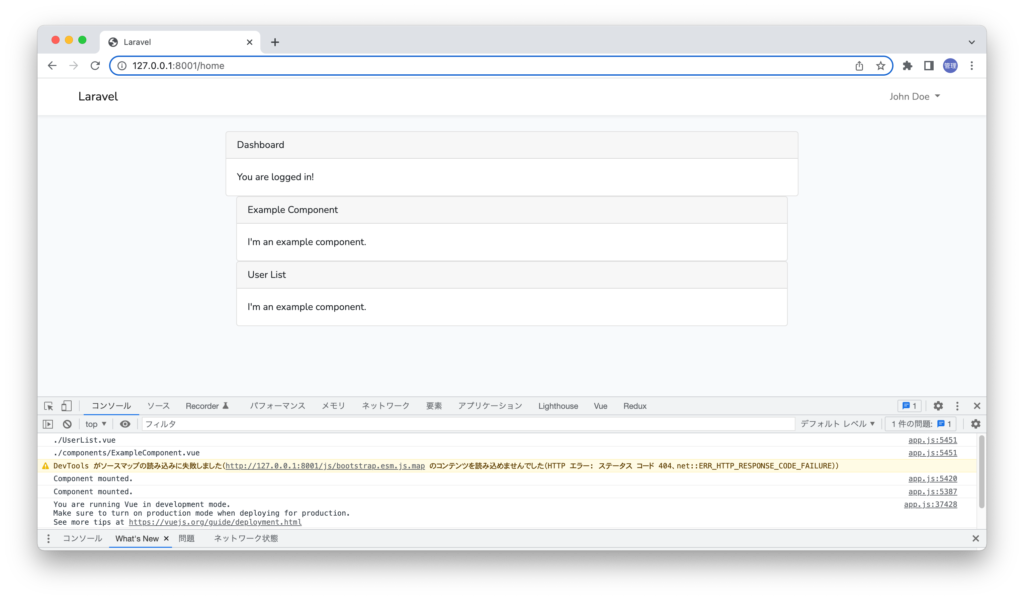
ブラウザで確認すると2つのコンポーネントが表示され、デベロッパーツールのコンソールを見ると./UserList.vueと./components/ExampleComponent.vueが読み込まれていることがわかります。
さらにUser Listでは外部のリソースから取得したデータを表示するように設定を行います。bootstrap.jsファイルでaxiosのimportを行っているのでaxiosを利用することができます。JSONPlaceHolderという外部リソースを利用しましたg、Laravelのバックエンドから取得したい場合はapi.phpに登録したルーティングに対してGETリクエストを送信することになります。
<template>
    <div class="container">
        <div class="row justify-content-center">
            <div class="col-md-8">
                <div class="card">
                    <div class="card-header">User Lists</div>

                    <div class="card-body">
                        <ul>
                            <li v-for="user in users" :key="user.id">
                                {{ user.name }}
                            </li>
                        </ul>
                    </div>
                </div>
            </div>
        </div>
    </div>
</template>

<script>
export default {
    data() {
        return {
            users: [],
        };
    },
    mounted() {
        axios
            .get("https://jsonplaceholder.typicode.com/users")
            .then((response) => {
                this.users = response.data;
            });
    },
};
</script>
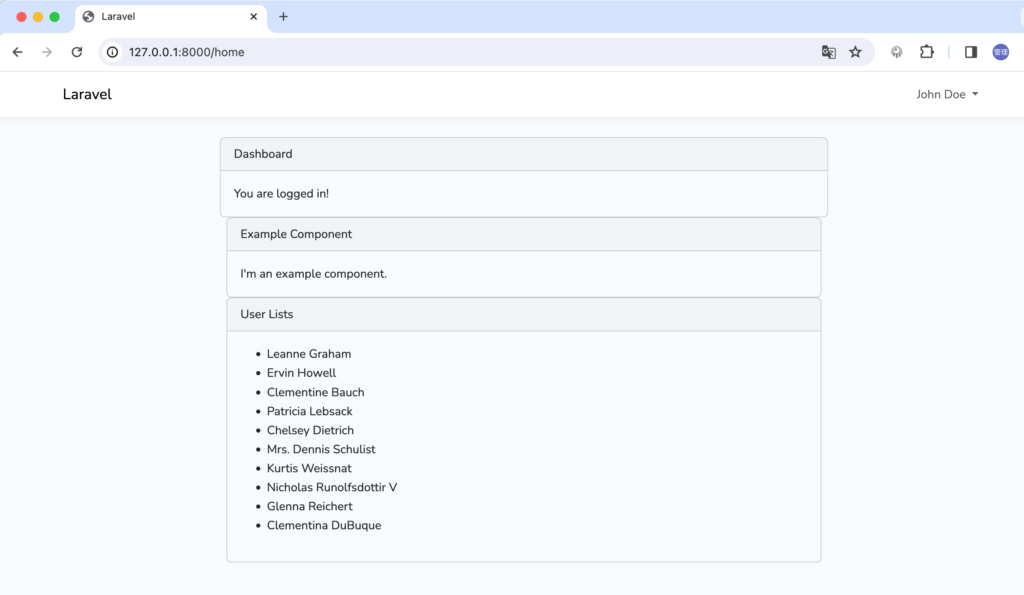
Vueを選択した場合のコンポーネントの登録方法と利用方法を理解することができました。Vueを選択した場合はBladeファイルにコンポーネントを追加することでVueを利用することができます。
Laravel UIに認証機能を利用するだけであれば新しい技術を習得する必要がないのでLaravel BreezeやLaravel Jetstreamを利用するより簡単かもしれません。
