Google Analyticsの新規サイトの追加方法

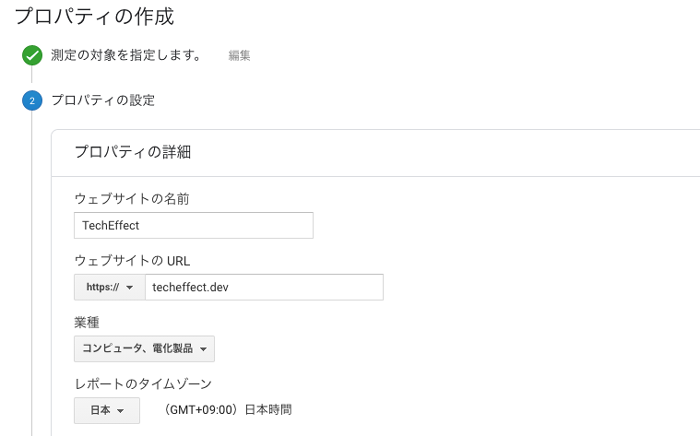
新規のドメインを取得した際に既存のGoogle Analyticsのアカウントにサイトを追加する方法(プロパティを作成)方法について記述しています。新しいドメイン(https://techeffect.dev)を取得したので下記の手順で追加を行いました。
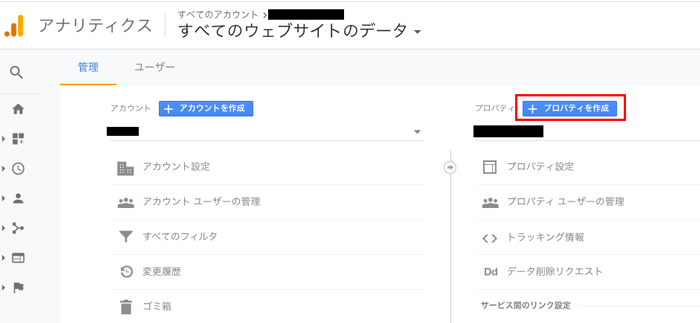
Google Analyticsにログイン後左下にある管理をクリックします。

画面の真ん中にある赤枠で囲んだ”プロパティを作成”ボタンをクリックします。
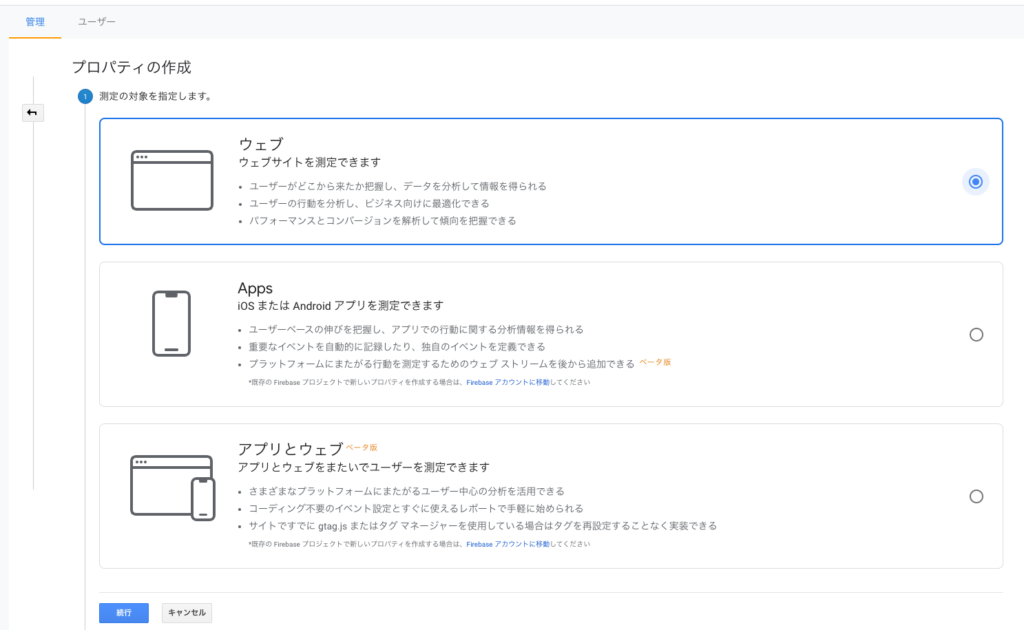
測定対象を選択する画面が表示されるので測定を行いたい対象を選択してください。ここではブログを想定しているのでウェブを選択します。選択したら、続行ボタンを押してください。
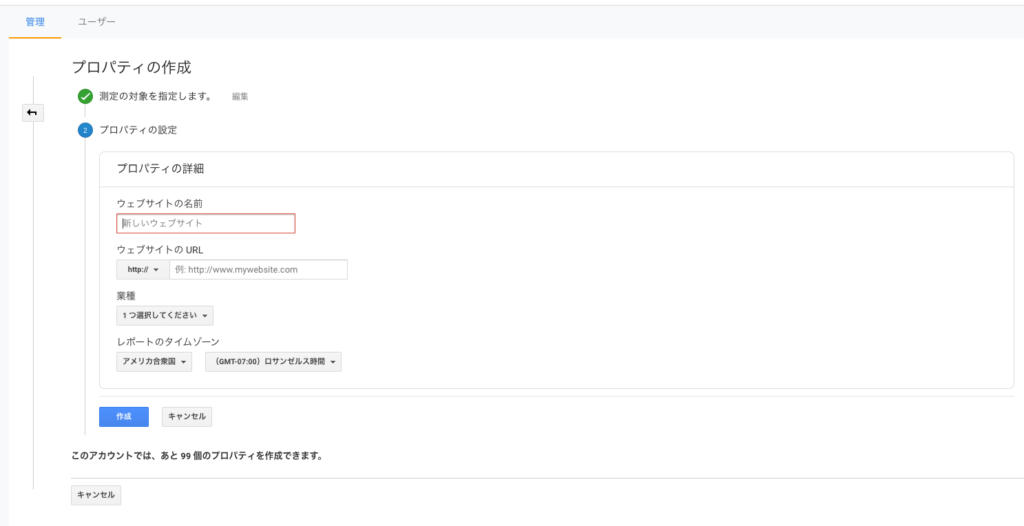
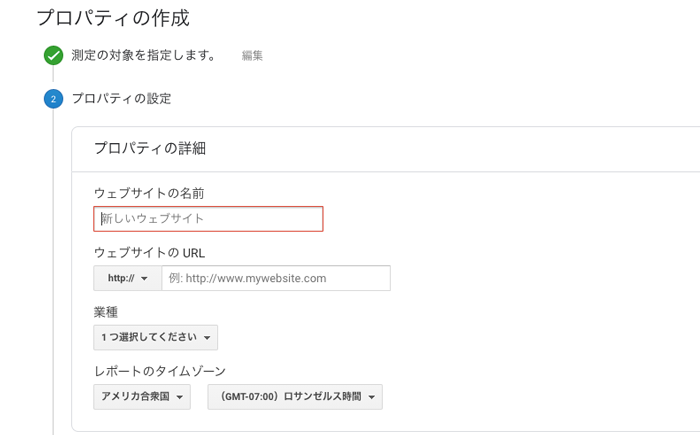
ウェブサイトの名前、URL、業種、タイムゾーンを選択します。URLではhttpかhttpsを選択することができます。
拡大すると下記の画面です。
自分が管理を行うドメインの情報を入力してください。入力が完了したら、作成ボタンをクリックしてください。
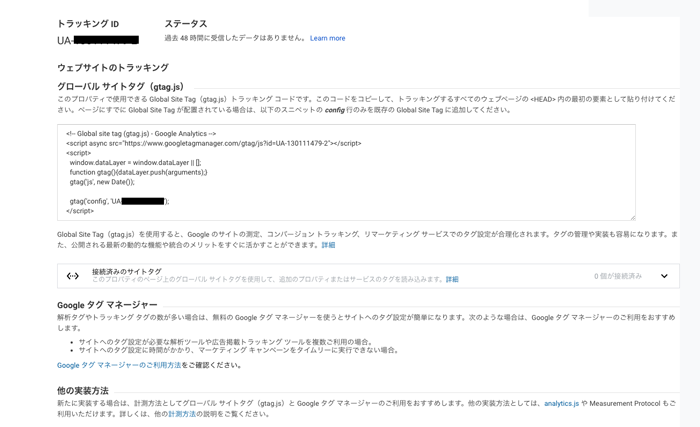
トラッキング情報などが表示されます。グローバルサイトタグを追加するサイトのページに貼り付けると計測が開始されます。Googleタグマネージャーでも管理が可能です。
以上でGoogle Analyticsのサイトの登録は完了です。