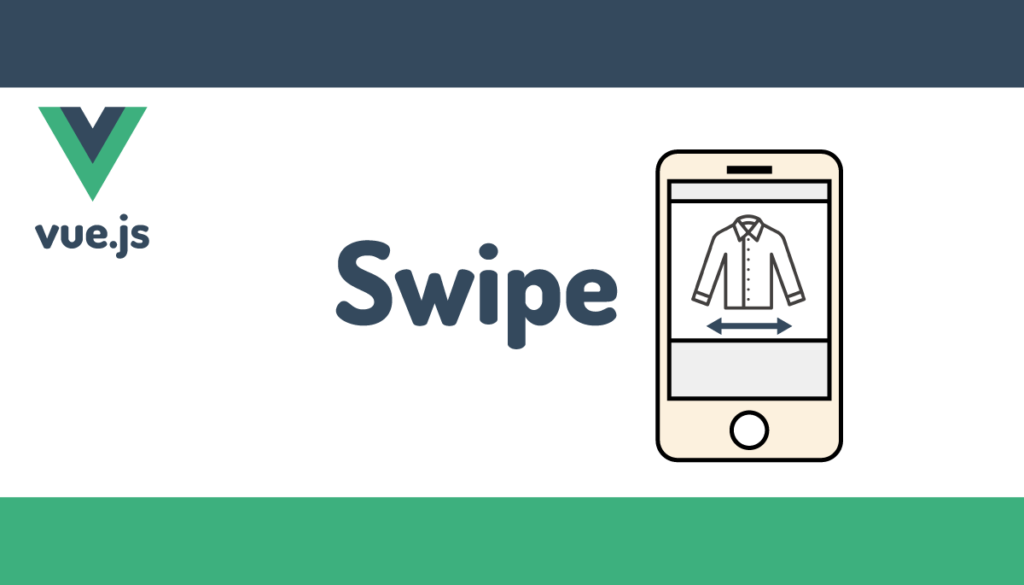
Vue.js+touchイベントで一から作るスマホ用スワイプ機能
スマホ用のスワイプ機能って何??と思った人はユニクロの商品ページにアクセスしてください。スマホでユニクロの商品ページにアクセスすると上部に商品画像が表示されます。その表示画像を左右にスワイプすることで商品に登録されている画像を確認することできます。
スワイプのライブラリにはSwiper.jsというものがありますが、本文書ではライブラリを利用せず一からユニクロのようなスワイプ機能を実装していきます。
詳細に説明を行っているのでスワイプを実装した経験がない人も仕組みは理解できるかと思います。ぜひチャレンジしてみてください。
環境の構築
Vue.jsのバージョン3を利用して動作確認を行います。本文書ではmacOS Big Surでvue createコマンドを利用してVue.jsのプロジェクトを作成しています。
実装時はChromeのデベロッパーツールでiPhoneをエミュレートして動作確認を行うこともできますがローカル環境であればvueプロジェクトで起動している場合はIPアドレス:8080でスマホからもアクセスすることが可能です。後半に記述するスクロールの処理については実際にスマホを利用して動作確認を行います。
画像の準備
スワイプを行うためにはスワイプで画像を切り替えるために数枚の画像データが必要となります。本文書ではユニクロの商品ページをイメージして作成するためTシャツの画像5枚を用意しました。各自複数枚の同じサイズの画像を準備してください。準備した画像はすべてpublicフォルダの下に保存してください。
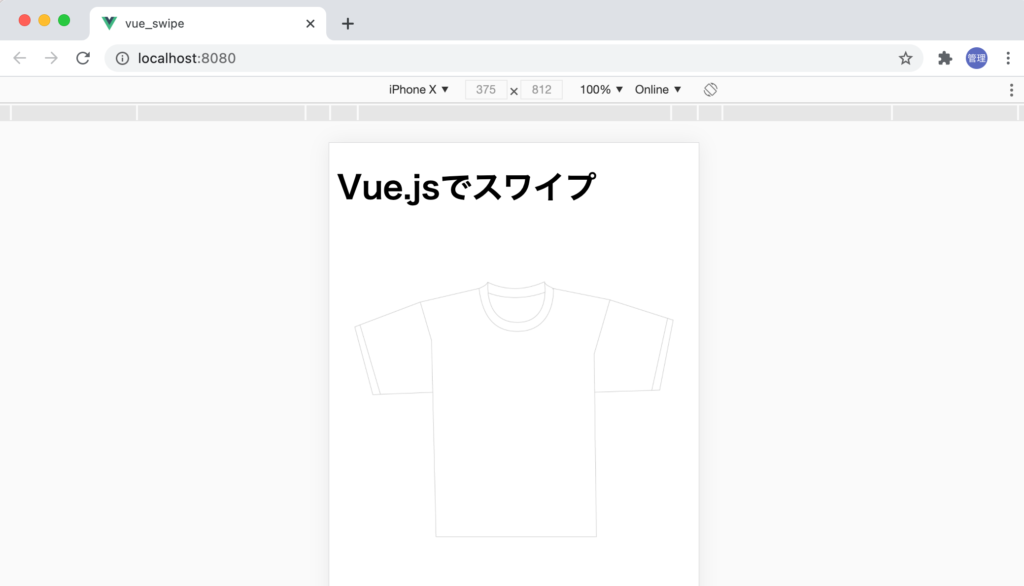
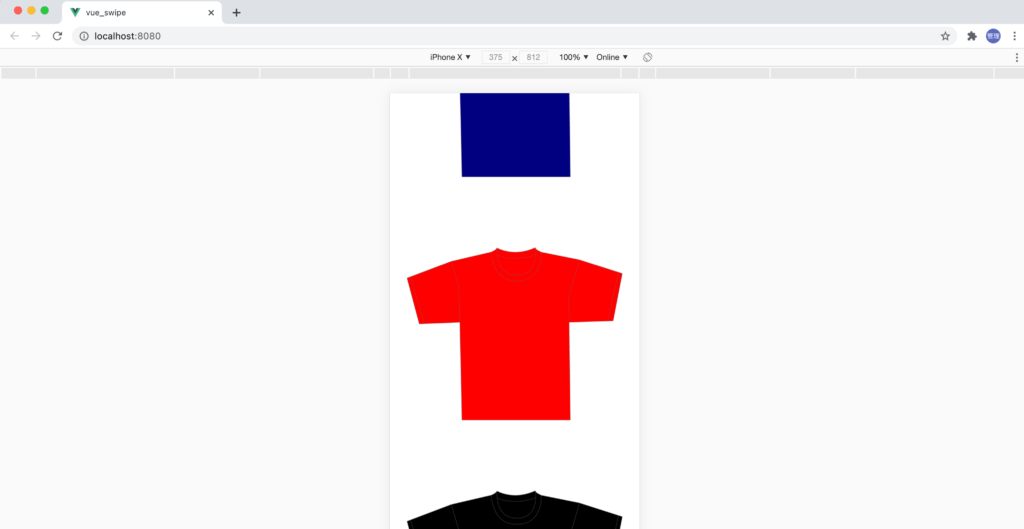
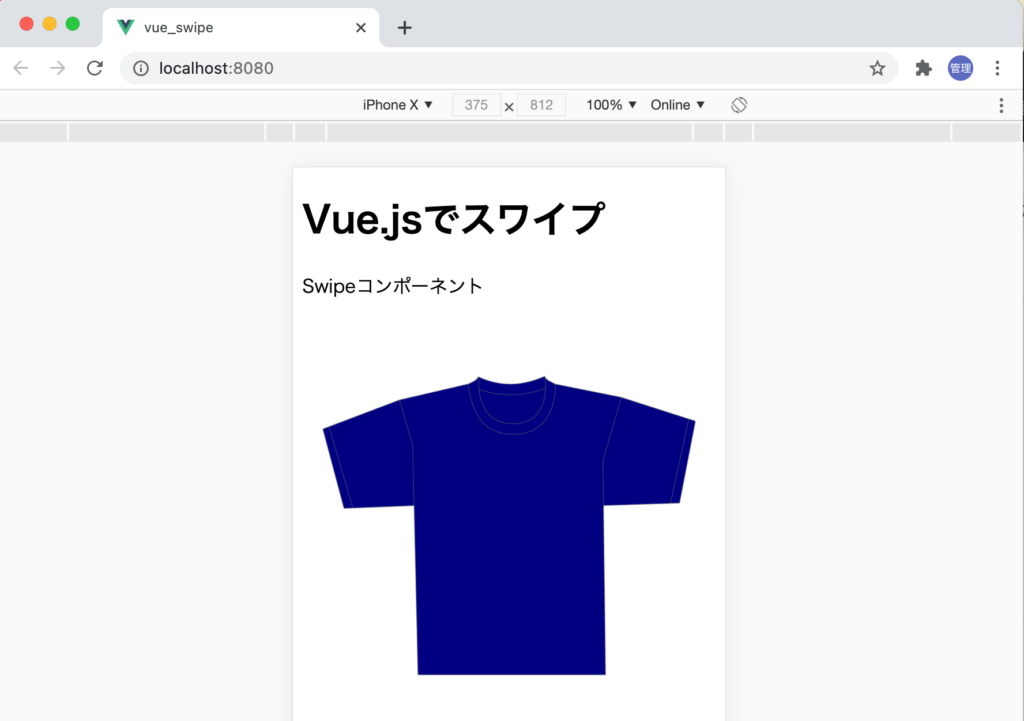
publicフォルダに保存した画像ファイル(white.png)がブラウザ上に表示されるか確認を行っておきます。
<template>
  <h1>Vue.jsでスワイプ</h1>
  <img src="white.png" style="width:100%;height:100%" />
</template>

<script>
</script>
設定後はブラウザを使ってpublicに保存した画像がブラウザ上に表示されるか確認を行います。ChromeでデベロッパーツールでiPhoneXをエミュレートして表示させています。
Swipeコンポーネント
スワイプ機能を持つコンポーネントSwipe.vueファイルをcomponentsフォルダに作成します。
Swipe.vueファイルにコードを記述する前にSwipe.vueファイルの親コンポーネントであるApp.vueファイルでSwipeコンポーネントに渡す画像情報を設定します。
親コンポーネントでの設定
親コンポーネントのApp.vueファイルでは、Swipeコンポーネントをimportし、データプロパティimagesを定義します。定義したimagesはSwipeコンポーネントにpropsとして渡します。
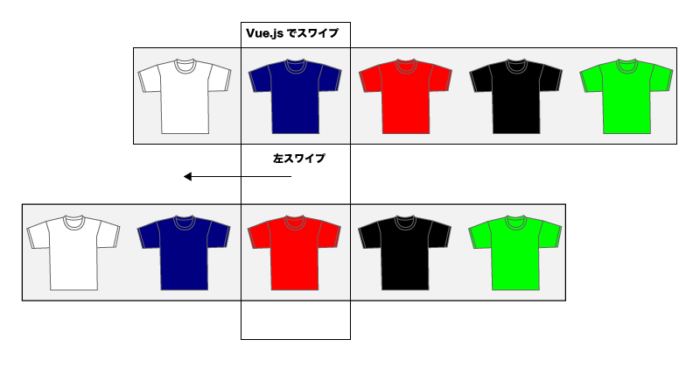
imagesは配列の中に今回準備した5枚の画像のパスとidを設定しています。画像のファイル名にはTシャツのカラー名をつけています。
<template>
  <h1>Vue.jsでスワイプ</h1>
  <Swipe :images="images" />
</template>

<script>
import Swipe from './components/Swipe.vue'

export default {
  components: {
    Swipe
  },
  data(){
    return {
      images:[
        {id:1,src:'/white.png'},
        {id:2,src:'/navy.png'},
        {id:3,src:'/red.png'},
        {id:4,src:'/black.png'},
        {id:5,src:'green.png'},
      ]
    }
  }
}
</script>
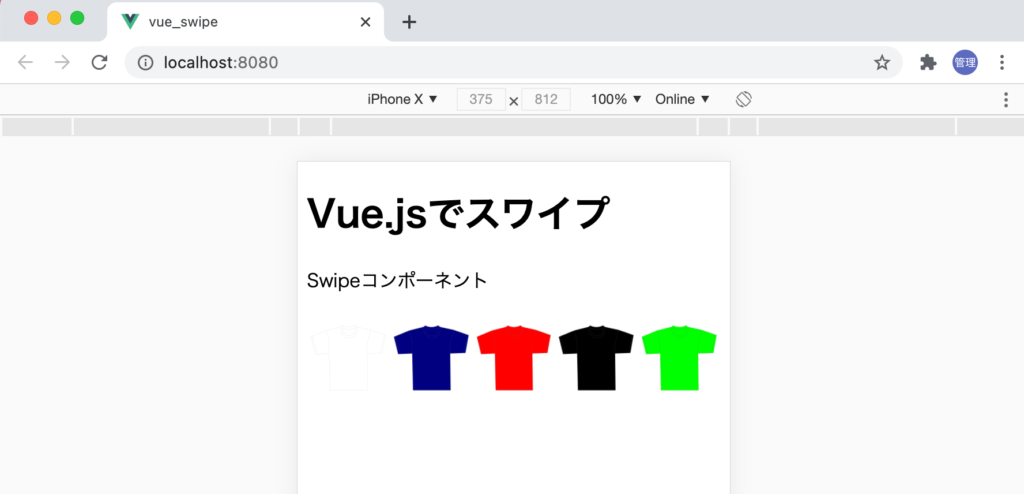
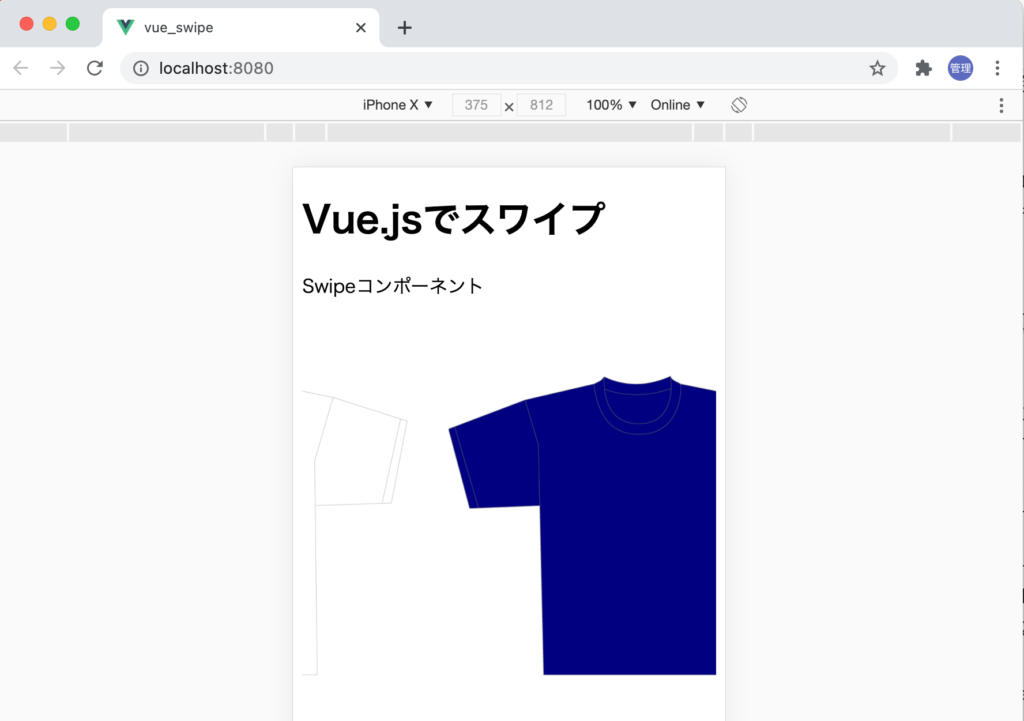
Swipeコンポーネントでの画像の表示
propsでimagesが渡されてくるのでv-forディレクティブを使って展開しすべての画像ファイルがブラウザに表示されることを確認します。
<template>
<p>Swipeコンポーネント</p>
<div>
  <div>
    <div v-for="image in images" :key="image.id">
      <img :src="image.src" style="width:100%;height:100%"/>
    </div>
  </div>
</div>
</template>

<script>
export default {
  props:['images']
}
</script>
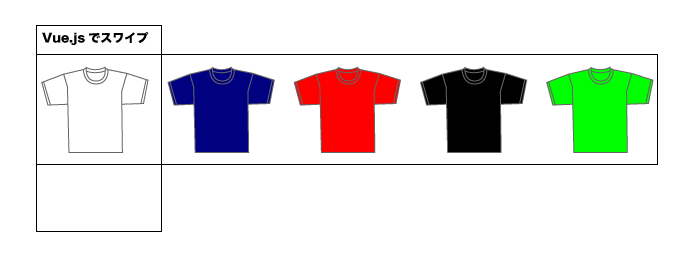
v-forで展開した5つの画像は縦一列に並んで表示されます。画面の表示の関係でwhiteカラーの下にnavyカラーの画像しか表示されていませんが、実際に5枚の画像が並んで表示されています。
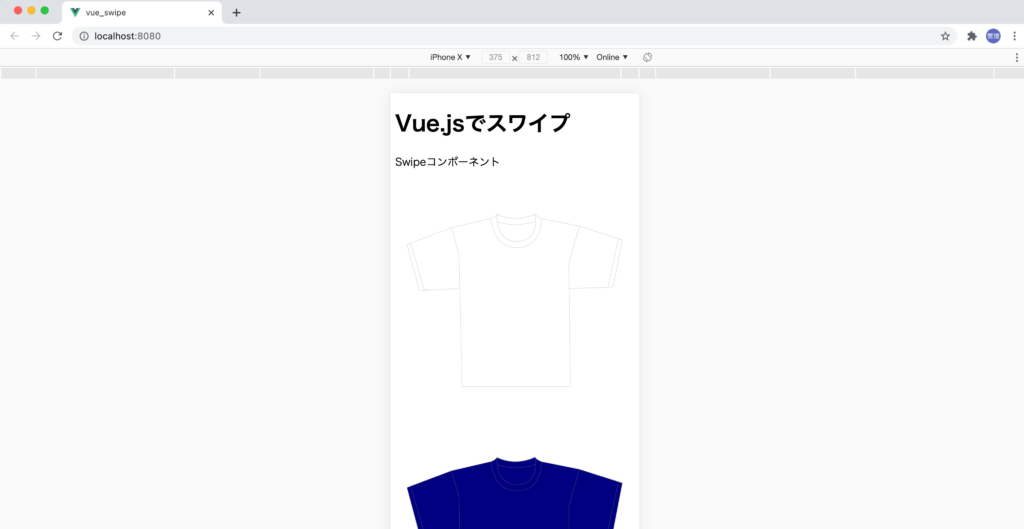
スクロールすると他の色の画像も確認することができます。
画像の表示設定変更(flexbox利用)
縦方向に画像が表示されているため、flexboxを利用して画像の並びを縦から横方向に変更します。
<div style="display:flex;">
  <div v-for="image in images" :key="image.id">
    <img :src="image.src" style="width:100%;height:100%"/>
  </div>
</div>
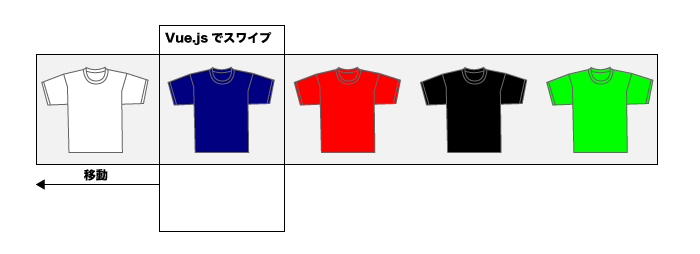
display:flexを設定すると画像が横方向に並びます。横方向に並びましたが、すべての画像がページの横幅に収まるように調整されています。
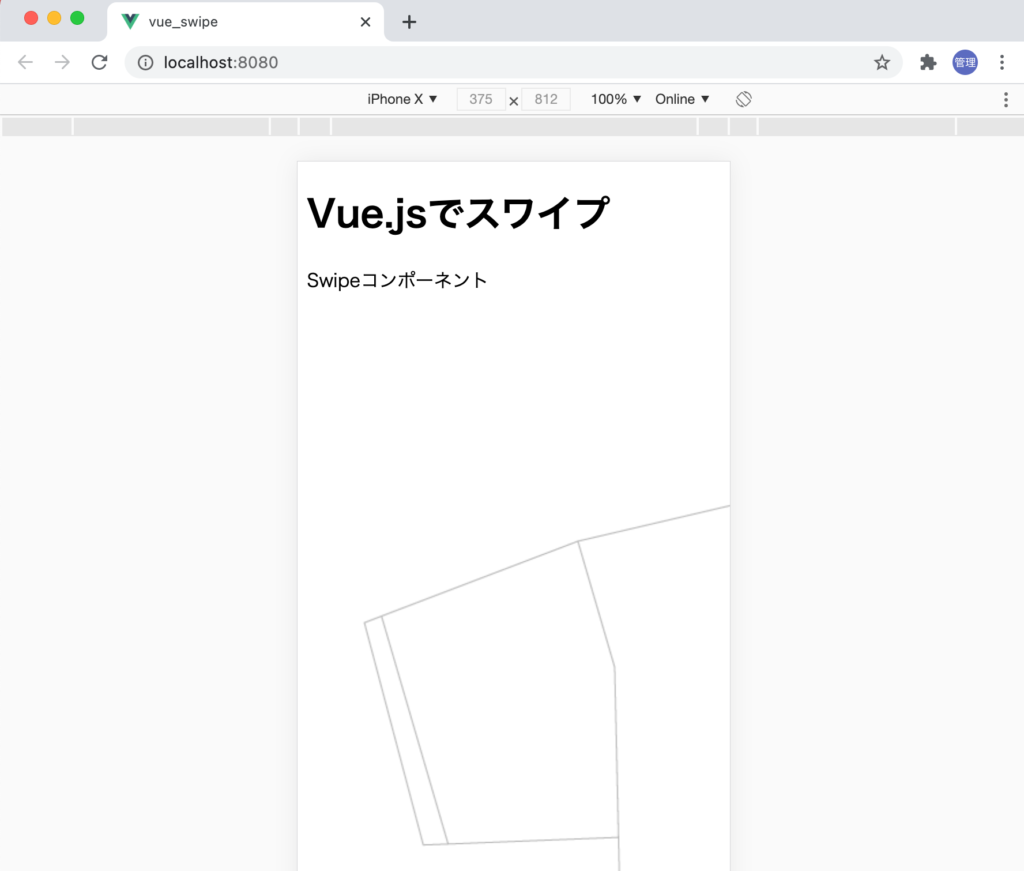
スワイプでは一枚の画像のみページに表示させる必要があるため、flexboxのflex-shrinkを利用します。
<div style="display:flex;">
  <div v-for="image in images" :key="image.id" style="flex-shrink:0" >
    <img :src="image.src" style="width:100%;height:100%"/>
  </div>
</div>
flex-shrinkは0に設定すると画像がそのままのサイズで表示されてしまいます。ブラウザ上には袖の一部しか表示されていませんが、右側にスクロールすることが可能でスクロールするとwhiteカラーのTシャツだけではなく他の色の画像もすべて確認できます。
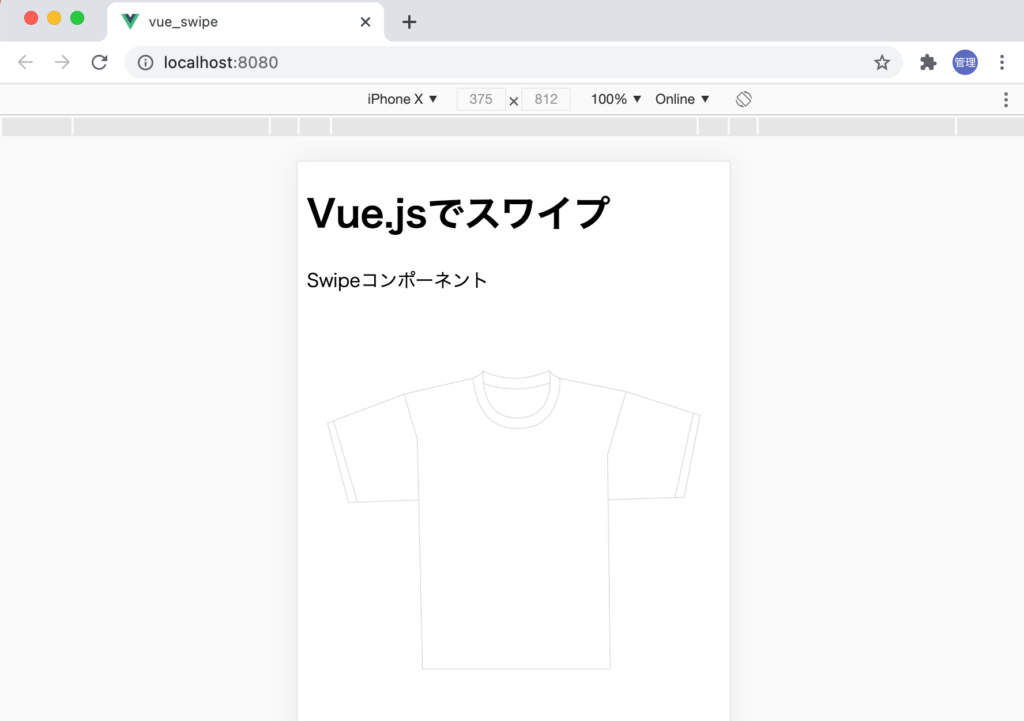
画像をブラウザ上に表示させるためにimgタグにwidth:100%;height:100%を設定します。
<div
  v-for="image in images"
  :key="image.id"
  style="flex-shrink:0;width:100%;height:100%;"
>
  <img :src="image.src" style="width:100%;height:100%"/>
</div>
設定後はページに1つの画像が収まった状態で表示されます。
この設定のままでは引き続き右側にスクロールすることができます。
スクロールできないようにするためoverflowの設定を使ってページに収まっていない部分を非表示にします。
<div style="overflow-x:hidden">
  <div style="display:flex;">
    <div
      v-for="image in images"
      :key="image.id"
      style="flex-shrink:0;width:100%;height:100%;"
    >
      <img :src="image.src" style="width:100%;height:100%"/>
    </div>
  </div>
</div>
overflow-xをhiddenに設定する前はスクロールすることができましたが設定後は右側にスクロールを行えずwhiteカラーのTシャツが画面いっぱいに広がったままです。
実際にはoverflow-xでhiddenを設定しているためページには表示されていないだけで下記のように画像は存在しています。
画像の横移動
先ほど説明した通り、white以外の画像は表示されていませんが存在はしています。他の色の画像をページに表示させるために画像を包んでいる要素(背景グレー)を左方向に移動させます。
背景がグレーの要素を左方向に移動させることができればwhite以外の画像もページ上に表示させることができます。
要素の移動にはtransformプロパティを使います。translate3d(-250px,0,0)を設定することで要素の開始がX軸方向に-250pxとなり、背景がグレーの要素が左側に250px移動します。
<div style="overflow-x:hidden">
  <div style="display:flex;transform: translate3d(-250px,0,0)">
    <div
      v-for="image in images"
      :key="image.id"
      style="flex-shrink:0;width:100%;height:100%;"
    >
      <img :src="image.src" style="width:100%;height:100%"/>
    </div>
  </div>
</div>
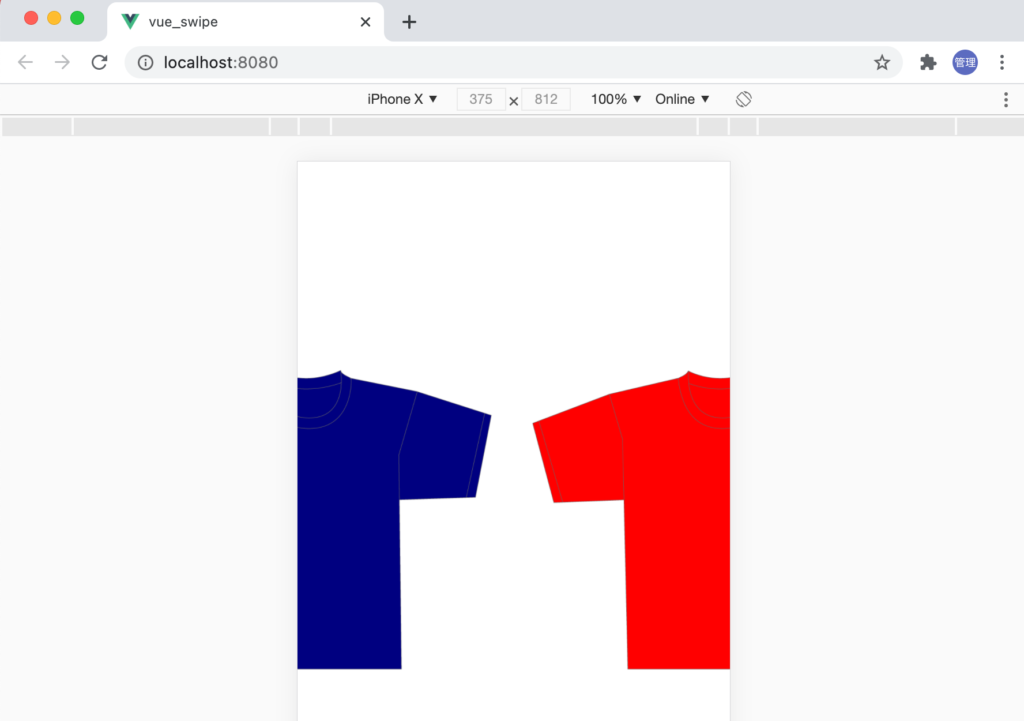
要素が横方向に移動することができたので、これまで隠れていたnavyカラーのTシャツの一部がページ上に表示されます。
今は適当に250pxを設定しましたが、ページの横幅がわかれば真ん中に画像を表示させることができます。
refを利用し要素の横幅を取得
Vue.jsのrefを利用するとVueから直接要素にアクセスを行い横幅のwidth情報を取得することができます。
<div
  style="display:flex;transform: translate3d(-250px,0,0)"
  ref="swipe"
>
動作確認のため、ライフサイクルフックのmountedで要素の幅を取得します。
export default {
  props:['images'],
  mounted(){
    console.log(this.$refs.swipe.offsetWidth)
  }
}
デベロッパーツールで確認するとrefを設定した要素の幅が確認できるはずです。この環境では、359と表示されました。
要素の横幅移動
要素の横幅を取得することができたのでこの幅分をtransformで設定してみます。
<div
  style="display:flex;transform: translate3d(-359px,0,0)"
  ref="swipe"
>
ブラウザで確認すると隣の画像がページの中心に表示されていることが確認できます。
2番目の画像では-359px, 3番目の画像では-359px*2というように359pxを単位に設定していくことでブラウザの中央に準備した各画像を表示させることができます。
ここまでの流れでブラウザに表示させたい画像の設定方法について理解することができました。
スマホではユーザが指で画面をタッチすることで処理を行うことができるのでここからはtouchイベントを利用してブラウザに表示させる画像を切り替えます。
touchイベント
touchイベントの動作確認
今回のスワイプではtouchイベントの中のtouchstart, touchmove, touchendの3つのイベントを利用します。touchstartはユーザがtouchstartイベントを設定した要素を指でタッチすると発火されます。touchendは指を離すと発火され、touchmoveは要素を指でタッチしている間中に発火されるイベントです。
要素に3つのtouchイベントを設定して動作を確認してみましょう。
<div
  v-for="image in images"
  :key="image.id"
  style="flex-shrink:0;width:100%;height:100%;"
  @touchstart="touchStart"
  @touchmove="touchMove"
  @touchend="touchEnd"
>
  <img :src="image.src" style="width:100%;height:100%"/>
</div>
各イベントが発火するとconsole.logにメッセージが表示させます。
export default {
  props:['images'],
  methods:{
    touchStart(){
      console.log('タッチスタート');
    },
    touchMove(){
      console.log('タッチムーブ');
    },
    touchEnd(){
      console.log('タッチエンド');
    }
  }
}
PCのブラウザでエミュレートしている場合は、ブラウザ上の画像をクリックしクリックしたまま移動してクリックを外してください。
下記のようにメッセージが表示されます。touchmoveは移動する度に発火するので何度も”タッチムーブ”メッセージが表示されます。

touchによる画像の切り替え
touchイベントを利用して要素をタッチすると画像が切り替わるように設定を行います。切り替える場合は位置情報が必要となるので、refで取得した要素の幅を利用します。
画像を含んだ要素の最初の位置はデフォルトの0pxに設定します。0pxに設定するとwhiteカラーの画像がブラウザの中心に表示されます。
<div
  style="display:flex;transform: translate3d(0px,0,0)"
  ref="swipe"
>
Vue.jsにデータプロパティpositionを追加します。positionにはtranslate3dで設定する位置の情報を保存し、touchstartイベントが発火する度に要素の幅を追加し移動させます。移動の幅はrefを使って取得したwidthを利用します。
export default {
  props:['images'],
  data(){
    return {
      position:0,
    }
  },
  methods:{
    touchStart(){
      this.position = this.position + this.$refs.swipe.offsetWidth;
      this.$refs.swipe.style.transform = `translate3d(-${this.position}px,0,0)`
    },
    touchMove(){
      console.log('タッチムーブ');
    },
    touchEnd(){
      console.log('タッチエンド');
    }
  }
}
設定後、動作確認を行うとtouchする度に画像が切り替わり、imagesに保存されているすべての画像がページ上に表示されることが確認できます。しかし、最後の画像表示後にタッチしてもそれ以上画像がないので何も表示されません。
スワイプによる画像の切り替え
スワイプは指を画面に触れた状態で左右どちらからにスライドさせる操作です。toushstartイベントでtouchした場所を取得し、touchmoveで移動した距離を取得してtouchendイベントでどちらの方向にスワイプしたか確認します。
画面にタッチした位置はevent.touches[0].pageXで取得することができます。startXでタッチした場所を保存して、touchMoveイベントで指の位置情報を取得し、差分を取ることで移動距離moveXを取得しています。
moveXの移動距離が10より大きい場合は右にスワイプしており、-10より小さい場合は左にスワイプしていることとします。
export default {
  props:['images'],
  data(){
    return {
      position:0,
      startX:0,
      moveX:0,
    }
  },
  methods:{
    touchStart(e){
      this.startX = e.touches[0].pageX;
    },
    touchMove(e){
      this.moveX = e.touches[0].pageX - this.startX;
    },
    touchEnd(){
      if(this.moveX > 10){
        console.log('右スワイプ');
      }else if(this.moveX < -10){
        console.log('左スワイプ')
      }else{
        console.log('なし');
      }
    }
  }
}
実際に画面上でスワイプを行い、コンソールに右スワイプ、左スワイプが表示されることを確認してください。タッチしてから離すまでの距離が短い場合はメッセージに”なし”が表示されます。
スワイプに連動して表示画像が切り替わるように設定を行っていきます。データプロパティwidthを追加し、touchStartメソッドの中で要素の幅をwidthに保存します。
スワイプによりtransformプロパティのtranslate3dの値を更新しています。左スワイプの場合は要素が左側に移動するためもしnavyカラーで左スワイプを行うとredカラーの画像が表示されます。
export default {
  props:['images'],
  data(){
    return {
      position:0,
      startX:0,
      moveX:0,
      width:0,
    }
  },
  methods:{
    touchStart(e){
      this.width = this.$refs.swipe.offsetWidth;
      this.startX = e.touches[0].pageX;
    },
    touchMove(e){
      this.moveX = e.touches[0].pageX - this.startX;
    },
    touchEnd(){
      if(this.moveX > 10){
        this.position = this.position + this.width;
        this.$refs.swipe.style.transform = `translate3d(${this.position}px,0,0)`
        console.log('右スワイプ');
      }else if(this.moveX < -10){
        this.position = this.position - this.width;
        this.$refs.swipe.style.transform = `translate3d(${this.position}px,0,0)`
        console.log('左スワイプ')
      }else{
        this.$refs.swipe.style.transform = `translate3d(${this.position}px,0,0)`;
      }
    }
  }
}
whiteカラーで左スワイプ、greenカラーで右スワイプを行ってもその先に画像がないため何も表示されません。
whiteカラーの左側、greenカラーの左側に移動しないようにidを使って制御します。データプロパティidを追加し、初期値を1とします。1つ目の画像が表示されていることを意味します。左スワイプするとidが1増え、右スワイプするとidが1減るようにし、idが0にidが6にならないように条件を追加しています。
export default {
  props:['images'],
  data(){
    return {
      position:0,
      startX:0,
      moveX:0,
      width:0,
      id:1,
    }
  },
  methods:{
    touchStart(e){
      this.width = this.$refs.swipe.offsetWidth;
      this.startX = e.touches[0].pageX;
    },
    touchMove(e){
      this.moveX = e.touches[0].pageX - this.startX;
    },
    touchEnd(){
      if(this.moveX > 10 && this.id !== 1){
        this.position = this.position + this.width;
        this.$refs.swipe.style.transform = `translate3d(${this.position}px,0,0)`;
        this.id--;
        console.log('右スワイプ');
      }else if(this.moveX < -10 && this.id !== this.images.length){
        this.position = this.position - this.width;
        this.$refs.swipe.style.transform = `translate3d(${this.position}px,0,0)`;
        this.id++;
        console.log('左スワイプ')
      }else{
        this.$refs.swipe.style.transform = `translate3d(${this.position}px,0,0)`;
      }
    }
  }
}
この設定でwhiteカラーの左側、greenカラーの右側への要素の移動ができなくなるため5つの画像の範囲内でスワイプを行うことができます。
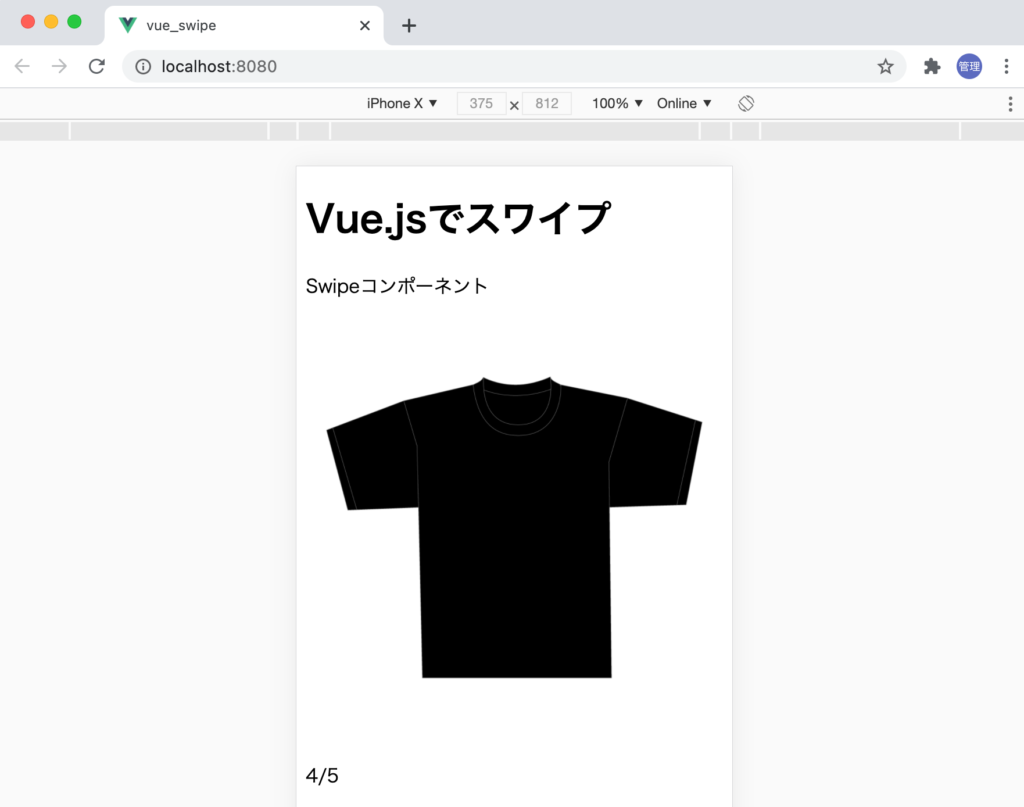
追加機能として現在の画像が何枚中、何番目なのかわかるように追加を行います。画像の総数はimagesのlengthから取得します。
<div style="overflow-x:hidden">
  <div
    style="display:flex;transform: translate3d(0px,0,0)"
    ref="swipe"
  >
    <div
      v-for="image in images"
      :key="image.id"
      style="flex-shrink:0;width:100%;height:100%;"
      @touchstart="touchStart"
      @touchmove="touchMove"
      @touchend="touchEnd"
    >
      <img :src="image.src" style="width:100%;height:100%"/>
    </div>
  </div>
  <p>{{ id }}/{{ this.images.length }}</p> //追加
</div>
blackカラーなので5枚中4枚目であることがわかります。
touchmoveイベントによる要素の移動
touchmoveイベントを利用して画像にタッチして指を動かしている間要素も一緒に移動できるように設定を行っていきます。これまではtouchendで指を離した時に要素の移動を行っていましたが、指を動かしている間もtransformプロパティを更新します。
touchMove(e){
  this.moveX = e.touches[0].pageX - this.startX;
  this.$refs.swipe.style.transform = `translate3d(${this.moveX + this.position}px,0,0)`;
},
touchMoveイベント中にも要素を移動させることで要素を指と一緒に移動することができます。
transition-durationによるアニメーション
スワイプを行うと一緒で画像の切り替えが行われましたが、transition-durationを設定することで滑らかに切り替えを行わせることができます。
要素にransition-duration:0msを設定します。0msはデフォルトなので設定してもスワイプの動作に何も変化はありません。
<div
  style="display:flex;transform: translate3d(0px,0,0);transition-duration:0ms"
  ref="swipe"
>
touchendで移動が発生した場合のみアニメーションで滑らかに移動を行いたいのでtransition-durationを300msに設定します。
touchEndメソッドで一度transition-durationを300msに設定するとtouchMoveメソッド内のtransformの更新にも影響を与え動きがぎこちなくなってしまうので、touchMoveメソッドでは0msに設定します。
methods:{
    touchStart(e){
      this.width = this.$refs.swipe.offsetWidth;
      this.startX = e.touches[0].pageX;
    },
    touchMove(e){
      this.moveX = e.touches[0].pageX - this.startX;
      this.$refs.swipe.style.transitionDuration = "0ms";
      this.$refs.swipe.style.transform = `translate3d(${this.moveX + this.position}px,0,0)`;
    },
    touchEnd(){
      if(this.moveX > 10 && this.id !== 1){
        this.position = this.position + this.width;
        this.$refs.swipe.style.transitionDuration = "300ms";
        this.$refs.swipe.style.transform = `translate3d(${this.position}px,0,0)`;
        this.id--;
        console.log('右スワイプ');
      }else if(this.moveX < -10 && this.id !== this.images.length){
        this.position = this.position - this.width;
        this.$refs.swipe.style.transitionDuration = "300ms";
        this.$refs.swipe.style.transform = `translate3d(${this.position}px,0,0)`;
        this.id++;
        console.log('左スワイプ')
      }else{
        this.$refs.swipe.style.transitionDuration = "300ms";
        this.$refs.swipe.style.transform = `translate3d(${this.position}px,0,0)`;
      }
    }
  }
transition-duration設定後は、スワイプでの画像の切り替えが滑らかになることが確認できます。
ここまでの設定でスワイプの設定方法の基本は理解することができました。ここからはさらに機能を追加していきます。
スワイプとスワイプ時間の組み合わせ
スワイプを行うと画像の切り替えを行うことができましたが、ある一定時間内であればスワイプにより画像の切り替えを行い、ある一定時間を超えるとスワイプを行わない機能を実装します。この機能により短いスワイプであれば画像の切り替えが行われ長い時間をかけたスワイプであれば画像の切り替えは行われません。
データプロパティに時間に関する3つのプロパティを追加します。
data(){
  return {
    position:0,
    startX:0,
    moveX:0,
    width:0,
    id:1,
    startTime:"",
    elapsedTime:"",
    allowedTime:300,
  }
},
startTimeはスワイプ開始時間、elapsedTimeはtoushstartからtouchendまでの経過時間を保存します。allowedTimeとelapsedTimeを比較し、スワイプによる画像の切り替えを行うかどうかを決めています。
s
methods:{
  touchStart(e){
    this.startTime = new Date().getTime();
    this.width = this.$refs.swipe.offsetWidth;
    this.startX = e.touches[0].pageX;
  },
  touchMove(e){
    this.moveX = e.touches[0].pageX - this.startX;
    this.$refs.swipe.style.transitionDuration = "0ms";
    this.$refs.swipe.style.transform = `translate3d(${this.moveX + this.position}px,0,0)`;
  },
  touchEnd(){
    this.elapsedTime = new Date().getTime() - this.startTime;
    if(this.elapsedTime <= this.allowedTime){
      if(this.moveX > 10 && this.id !== 1){
        this.position = this.position + this.width;
        this.$refs.swipe.style.transitionDuration = "300ms";
        this.$refs.swipe.style.transform = `translate3d(${this.position}px,0,0)`;
        this.id--;
        console.log('右スワイプ');
      }else if(this.moveX < -10 && this.id !== this.images.length){
        this.position = this.position - this.width;
        this.$refs.swipe.style.transitionDuration = "300ms";
        this.$refs.swipe.style.transform = `translate3d(${this.position}px,0,0)`;
        this.id++;
        console.log('左スワイプ')
      }else{
        this.$refs.swipe.style.transitionDuration = "300ms";
        this.$refs.swipe.style.transform = `translate3d(${this.position}px,0,0)`;
      }
    }else{
        this.$refs.swipe.style.transitionDuration = "300ms";
        this.$refs.swipe.style.transform = `translate3d(${this.position}px,0,0)`;
    }
  }
}
スクロールイベント
ここからは同じネットワーク上にあるスマホを利用して動作確認を行います。npm run serveコマンド実行後に表示されるNetworkのIPアドレスを利用してスマホからアクセスします。
% npm run serve
  App running at:
  - Local:   http://localhost:8080/
  - Network: http://192.168.2.176:8080/
スクロールを行えるように商品名や金額などのデータを追加します。
<template>
<div style="overflow-x:hidden;">
  <p>Swipeコンポーネント</p>
  <div
    style="display:flex;transform: translate3d(0px,0,0);transition-duration:0ms;"
    ref="swipe"
  >
    <div
      v-for="image in images"
      :key="image.id"
      style="flex-shrink:0;width:100%;height:100%;"
      @touchstart="touchStart"
      @touchmove="touchMove"
      @touchend="touchEnd"
    >
      <img :src="image.src" style="width:100%;height:100%"/>
    </div>
  </div>
  <p>{{ id }}/{{ this.images.length }}</p>
  <h1>Tシャツ</h1>
  <p>価格1000</p>
  <p>カラー:white, navy, red, black,green</p>
  <p>サイズ:S, M, L</p>
</div>
</template>
データを追加するとスクロールすることが可能になります。
表示されている画像上でスクロールを行うとスクロールしているのかスワイプしているのかわからず、同時に操作が行われるため画像が左右に動きながらスクロールするといった変な動作になります。
スクロールイベントの停止
画像上でのスクロールを止めるためにはpreventDefaultをtouchStartイベントで設定することで可能です。しかし、preventDefaultでスクロールを止めると今度は画面一杯に画像が表示されている場合は画像のどこをタッチしてもスクロールできないのでスクロールが行えなくなります。
@touchstart.prevent="touchStart"
スクロールとスワイプの識別
スクロールなのかスワイプなのかを識別する必要があるので新たにデータプロパティのscrollとmoveと追加します。またスクロールなので左右のX軸だけではなくY軸の移動も考慮する必要があるため、startY, moveYも追加しています。
data(){
  return {
    position:0,
    startX:0,
    startY:0,
    moveX:0,
    moveY:0,
    width:0,
    id:1,
    startTime:"",
    elapsedTime:"",
    allowedTime:300,
    move:false,
    scroll:false,
  }
},
startYとmoveYの取得startXとmoveXと同時に行います。
touchStart(e){
  this.move = false;
  this.scroll = false;
  this.startTime = new Date().getTime();
  this.width = this.$refs.swipe.offsetWidth;
  this.startX = e.touches[0].pageX;
  this.startY = e.touches[0].pageY;
},
touchMove(e){
  this.moveX = e.touches[0].pageX - this.startX;
  this.moveY = e.touches[0].pageY - this.startY;
  this.$refs.swipe.style.transitionDuration = "0ms";
  this.$refs.swipe.style.transform = `translate3d(${this.moveX + this.position}px,0,0)`;
},
moveがtrueの場合はスワイプ、scrollがtrueの場合はスクロールの操作とします。スワイプの場合はスクロールさせる必要がないのでpreventDefaultでスクロールの処理を停止させます。
touchStart(e){
  this.move = false;
  this.scroll = false;
  this.startTime = new Date().getTime();
  this.width = this.$refs.swipe.offsetWidth;
  this.startX = e.touches[0].pageX;
  this.startY = e.touches[0].pageY;
},
touchMove(e){
  this.moveX = e.touches[0].pageX - this.startX;
  if(this.move && !this.scroll){
    e.preventDefault()
    this.$refs.swipe.style.transitionDuration = "0ms";
    this.$refs.swipe.style.transform = `translate3d(${this.moveX + this.position}px,0,0)`;
  }
},
スクロールをtrue(scrollをtrue)にする条件はmoveの値がfalseでY軸の移動距離がX軸の移動距離も大きい場合としています。
if(!this.move && Math.abs(this.moveY/this.moveX) > 1){
  this.scroll = true;
}
スワイプをtrue(moveをtrue)にする条件は、moveXの移動が10より大きく、scrollがfalseの場合としています。scrollがfalseなのでX軸の移動がY軸の移動よりも小さい場合です。
touchMove(e){
  this.moveX = e.touches[0].pageX - this.startX;
  this.moveY = e.touches[0].pageY - this.startY;

  if(!this.move && Math.abs(this.moveY/this.moveX) > 1) this.scroll = true;

  if(Math.abs(this.moveX) > 10 && !this.scroll) this.move = true;

  if(this.move && !this.scroll){
    e.preventDefault()
    this.$refs.swipe.style.transitionDuration = "0ms";
    this.$refs.swipe.style.transform = `translate3d(${this.moveX + this.position}px,0,0)`;
  }
},
touchEndメソッドの移動の処理ではthis.scrollがfalseの場合のみ移動を行います。この設定でスクロールと画像の切り替えは同時には起こりません。
touchEnd(){
  this.elapsedTime = new Date().getTime() - this.startTime;
  if(this.elapsedTime <= this.allowedTime && !this.scroll){
    if(this.moveX > 10 && this.id !== 1){
      this.position = this.position + this.width;
      this.$refs.swipe.style.transitionDuration = "300ms";
      this.$refs.swipe.style.transform = `translate3d(${this.position}px,0,0)`;
      this.id--;
      console.log('右スワイプ');
    }else if(this.moveX < -10 && this.id !== this.images.length && !this.scroll){
      this.position = this.position - this.width;
      this.$refs.swipe.style.transitionDuration = "300ms";
      this.$refs.swipe.style.transform = `translate3d(${this.position}px,0,0)`;
      this.id++;
      console.log('左スワイプ')
    }else{
      this.$refs.swipe.style.transitionDuration = "300ms";
      this.$refs.swipe.style.transform = `translate3d(${this.position}px,0,0)`;
    }
  }else{
      this.$refs.swipe.style.transitionDuration = "300ms";
      this.$refs.swipe.style.transform = `translate3d(${this.position}px,0,0)`;
  }
}
ここまでの設定でユニクロサイトの商品画像と同じような動作を行うことができます。